How to Connect Webchat to a WordPress Website
BotBee allows you to easily add a webchat widget to your website so visitors can chat with your chatbot directly from your site. If you are using WordPress, you can connect the widget either manually through your theme files or using a plugin.
Below is the complete step-by-step process.
1. Create and Customize Your Webchat Widget:
Before connecting the widget to your WordPress website, you first need to configure it inside the BotBee dashboard.
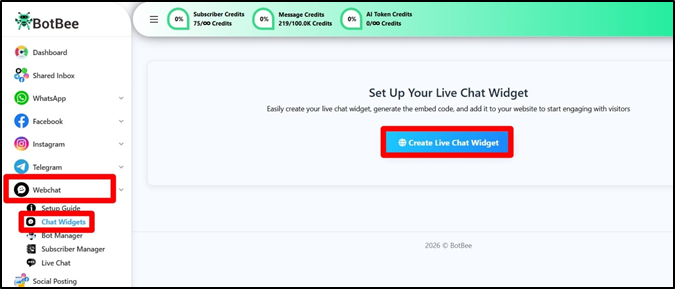
Step 1: Navigate to Webchat:
- Log in to your BotBee dashboard.
- From the left sidebar, Go to Webchat.
- Click on Chat Widget → Create Live Chat Widget.
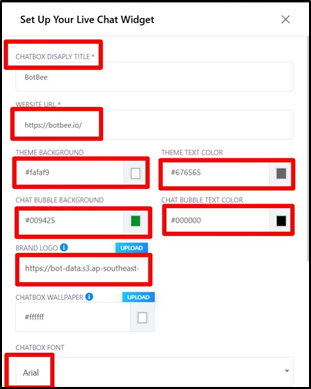
Step 2: Configure Basic Settings:
Fill in the basic details for your widget:
Chatbot Display Title: This is the name visitors will see in the chat widget.
Website URL: Paste the URL of your website where the widget will be used.
Step 3: Customize Design & Branding:
- You can personalize the appearance of the widget according to your brand.
- Choose your theme background color and text color to match your brand's identity.
- Set the chat bubble background color and chat bubble text color to reflect your brand's personality.
- Now upload your brand logo to personalize the chat widget.
- Optionally, you can also change the chatbot wallpaper to match your visual theme and make your chatbot interface more engaging.
- You can change chatbot font style also.
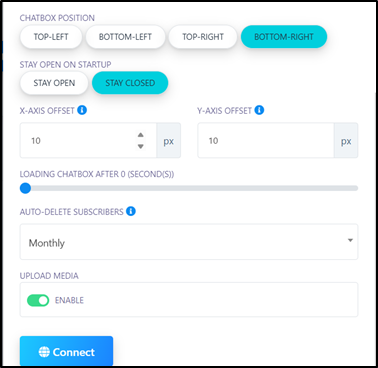
Step 4: Set Widget Placement and additional Settings:
- Choose where the chat bubble will appear on your website.
- You can position it at the top left, bottom left, top right, or bottom right, whatever suits your layout best.
- Fine-tune the position of your chat widget by adjusting the x-axis and y-axis offsets. This lets you control how far from the edges your chat box appears.
- You can choose to keep the chat box open by default to grab attention or closed for a more minimal look.
You can configure extra options such as:
- Chat display delay: Set a delay before the chat box appears to your visitors.
- Auto-delete settings: Auto deletes subscribers after weekly, monthly, quarterly. This helps you keep your audience clean and engaged.
- Upload Media: If you enable this, user can send media from live chat.
- Once everything is configured, click Connect.
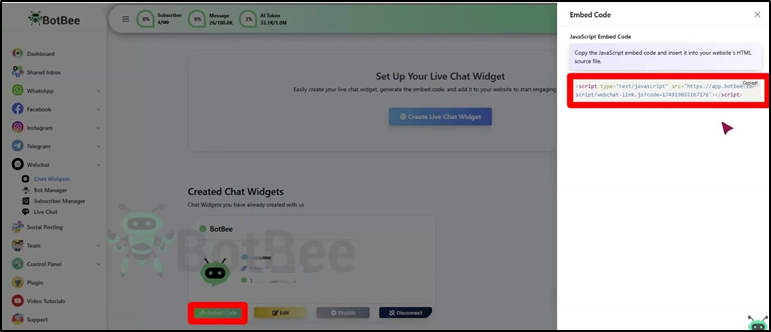
Step 5: Copy the Embed Code:
- After connecting the widget:
- Click Embed Code
- Copy the JavaScript snippet provided by BotBee
- This code will be added to your WordPress website.
2. Add Webchat to Your WordPress Website:
There are two ways to integrate the BotBee webchat into WordPress.
Method 1: Manual Integration (Theme Editor):
- This method requires adding the code directly into your website theme files.
- Log in to your WordPress Dashboard.
- Go to Appearance
- Click on Theme File Editor
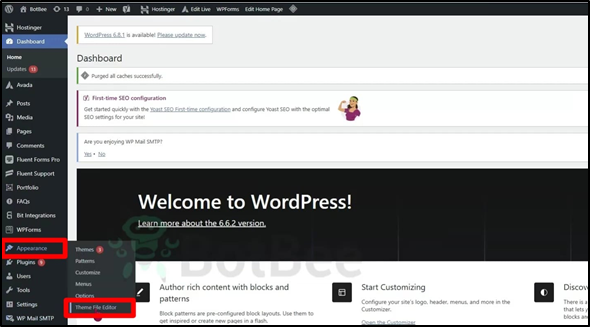
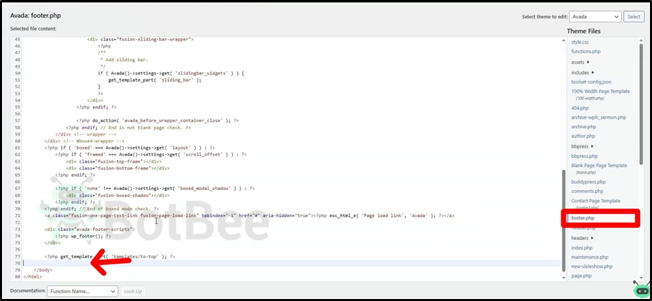
- On the right side, locate and open footer.php.
- Scroll to the bottom of the file.
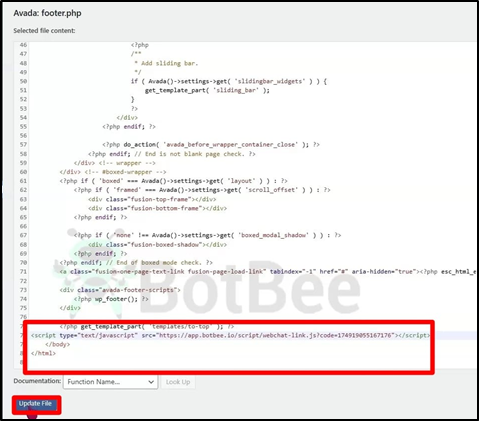
- Paste the JavaScript embed code just before the closing tag:
- Click Update File to save the changes.
- Your chat widget will now be added to the website.
Method 2: Plugin Integration (Recommended):
- Using a plugin is the safer and easier method, especially for beginners.
- It also prevents the code from being removed when your theme updates.
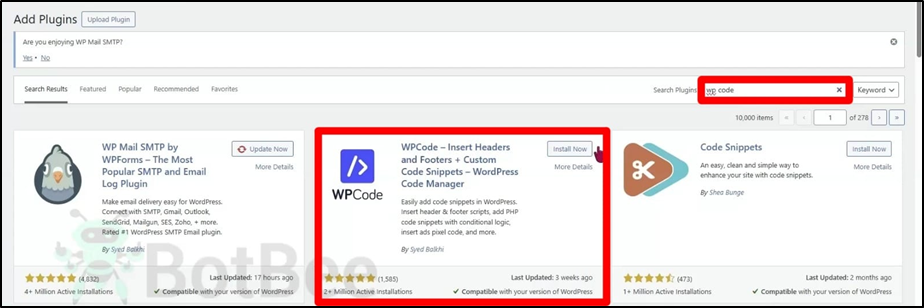
- Go to Plugins → Add New
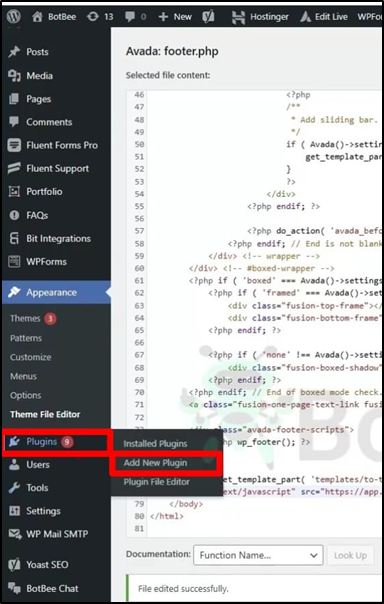
Search for WP Code.
Click Install and then Activate the plugin.
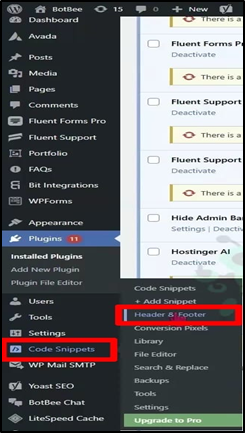
- In the left menu, navigate to Code Snippets
- Go to Header and Footer.
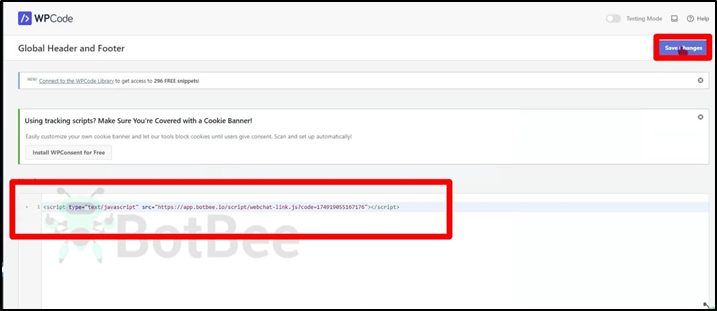
- Paste the BotBee embed code into the Footer section.
- Click Save Changes.
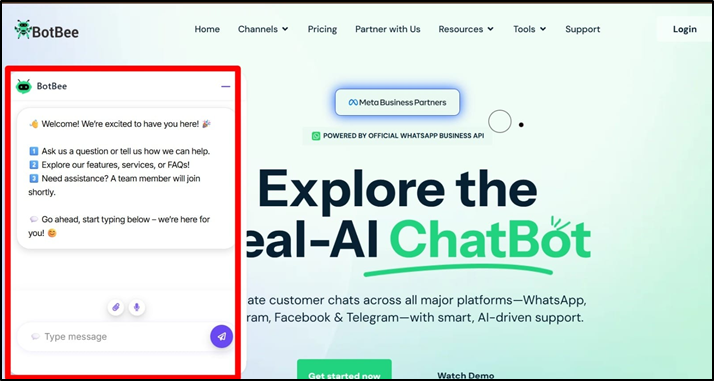
- The webchat widget will now appear on your website.
3. Verify the Connection:
- After adding the code, you should check if everything is working correctly.
- Refresh Your Website: Reload your website page. You should see the chat bubble in the position you selected.
- Test the Chat: Send a test message from the chat widget.
- Check BotBee Dashboard: Go back to BotBee → Live Chat and confirm that the message appears in the dashboard.
- If the message appears successfully, your WordPress webchat integration is complete.
Reference Video:
If you prefer video tutorials here are the links:
English: https://youtu.be/_0jVw8NkpHw?si=jto8hsQs3t-7OMsH
Still Need Help?
If you face difficulties during onboarding:
- Take a screenshot or screen recording.
- Share details with our support team.
Our team will review the onboarding step and guide you further.
Contact: 08069645300
Found this article helpful?
( 1 Out of 2 Found Helpful )