Google Sheet Data Fetch Integration
Google Sheets integration allows your bot to automatically fetch customer data from a spreadsheet and send it dynamically in WhatsApp replies. This is useful for use cases like order tracking, customer details lookup, booking confirmations, and more.
Follow the steps below to set up Google Sheets data fetching in BotBee.
Step 1: Initial Setup:
- Before configuring the bot, you need to connect your Google account and prepare your spreadsheet.
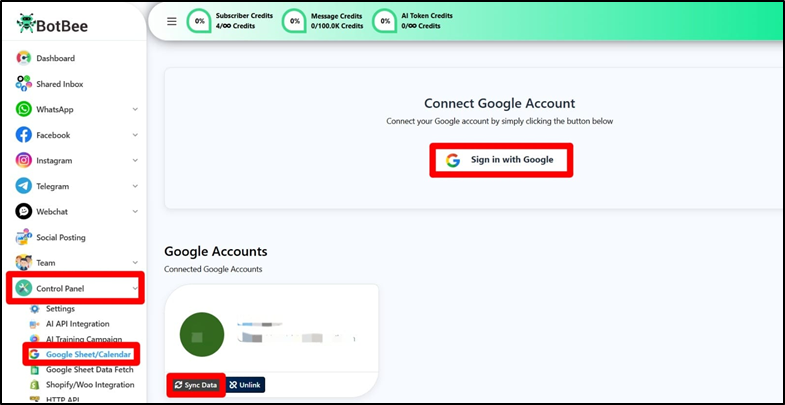
- Go to the BotBee Dashboard.
- Navigate to Control Panel → Google Sheet/Calender.
- Click on Sign in with Google.
- Log in using the same Google account where your Google Sheet is saved.
- Click on “Sync Data”.
(Note: During the authorization process, allow all required permissions so BotBee can access and read your Google Sheets.)
Step 2: Prepare Your Google Sheet:
You can either Create a New Google sheet or Connect an Existing one.
Create New Sheet:
- Click on “Create New Sheet”
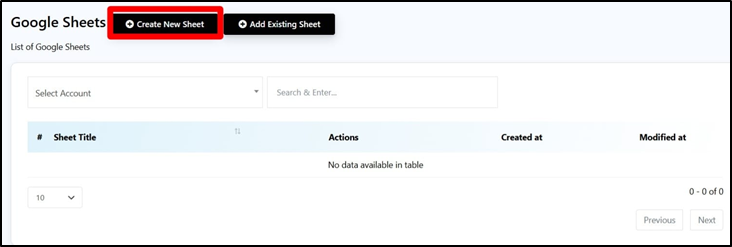
- Select your Google Account.
- Give your Sheet a Title.
- Add your required Column Headers.
- Click Save.

Connect existing Google Sheet:
- Click on “Add Existing Sheet”.
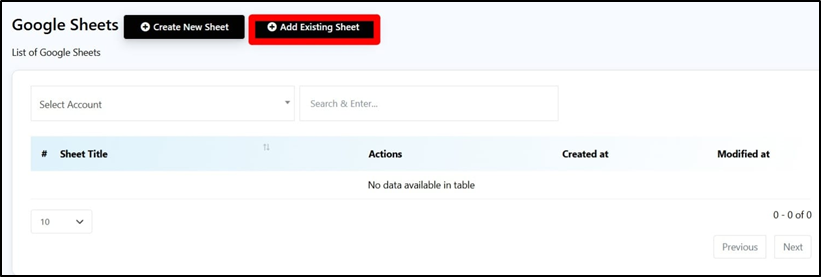
- Select your Google Account.
- Paste the Google Sheet ID.
(Note: You can find the Google Sheet ID in the sheet’s URL — it is the long string located between /d and /edit in the address bar.
Example URL: https://docs.google.com/spreadsheets/d/1aL7MW9wJNh2TtJYxPm086EBDbZf8kTBztZQgEnAJIbc/edit#gid=0
Sheet ID: 1aL7MW9wJNh2TtJYxPm086EBDbZf8kTBztZQgEnAJIbc)
- Click Save.

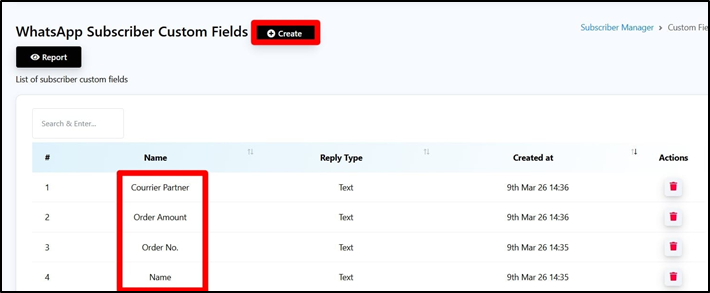
Step 3: Create Custom Fields:
- Go to Subscriber Manager under WhatsApp
- Click on Manage Custom Field.
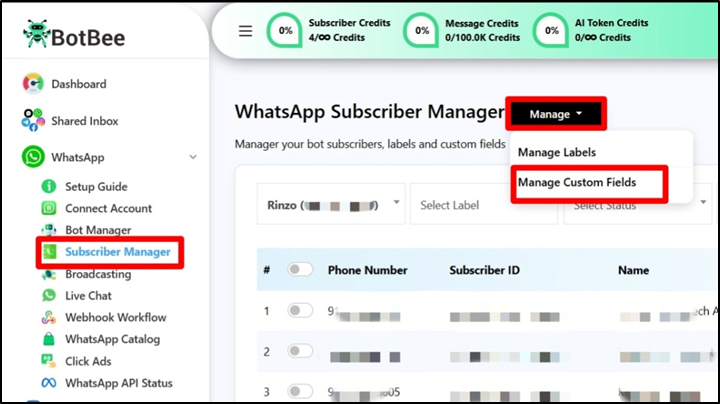
- Create a custom field for every column header in your Google Sheet.
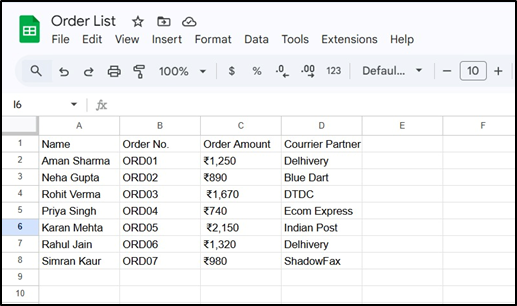
Example Sheet:
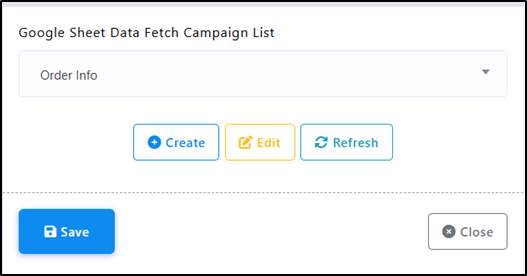
Step 4: Set Up the Data Fetch Campaign:
- Go to Control Panel → Google Sheet Data Fetch
- Select WhatsApp Data Fetch Campaign.
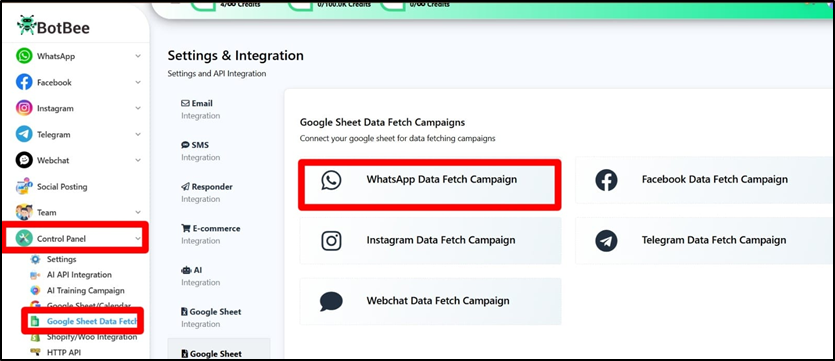
- Click Create “New” beside WhatsApp Fetch Data Campaign.
- Give the campaign a Name and Select the Google Sheet you want to use.

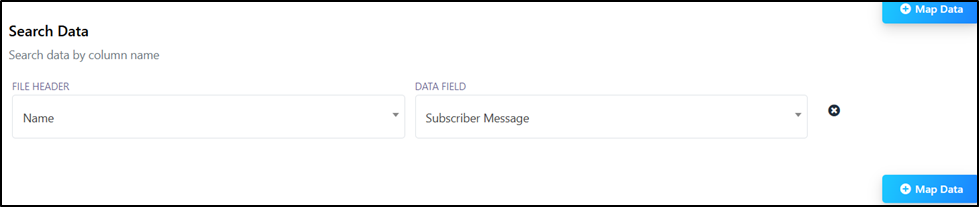
Map Search Data:
- Define how the bot will find the correct row in the sheet.
Example:
- File Header: Order Number
- Data Field: Subscriber Message
- This tells the system how to locate the correct record.
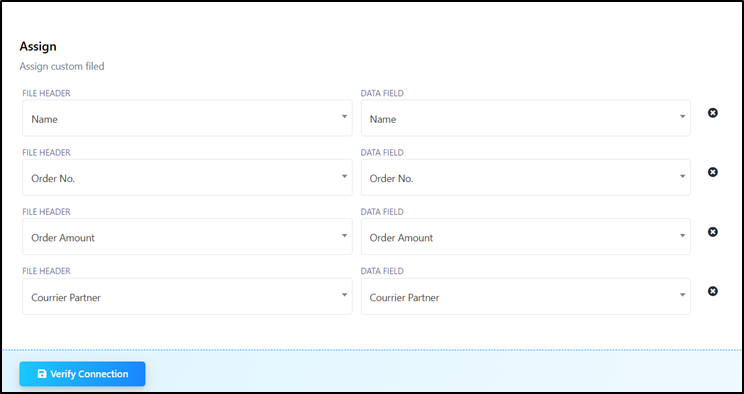
Map Columns:
- Map each column header to its corresponding custom field.
- Click on “Verify Connection”.
Step 5: Build the Bot Flow:
- To test the feature lets make a chatbot.
- Go to Bot Manager → Bot Reply.
- Click on Create.
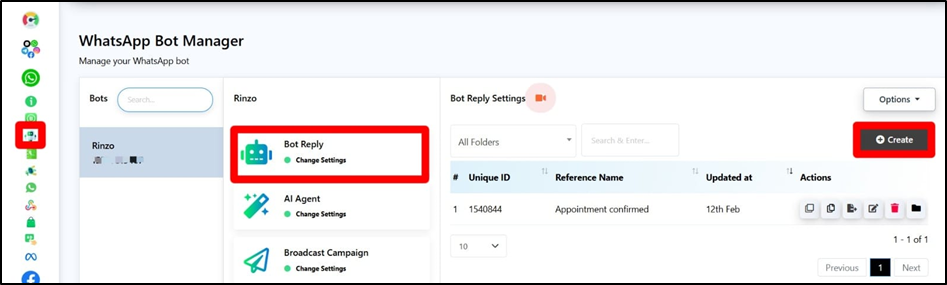
- Add a Trigger keyword. Example: Order.
- Add a User Input Flow element to collect the user's unique identifier.
- Select Order No. in “Save to custom Field”.
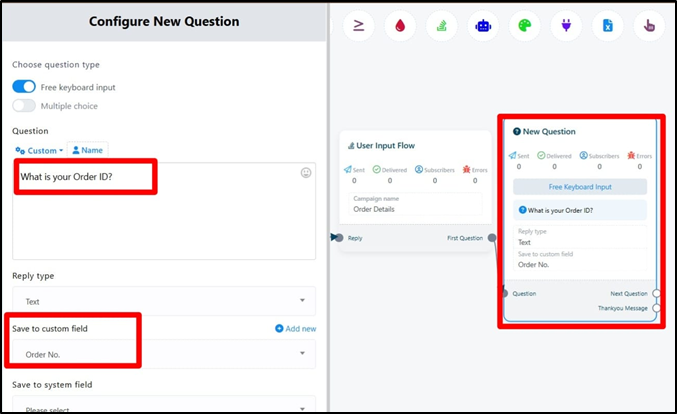
- Drag and drop from “Thank You Message” and choose Google Sheet data fetch element and select the Order Campaign.
- Now create the response message using custom field variables and Click Save.
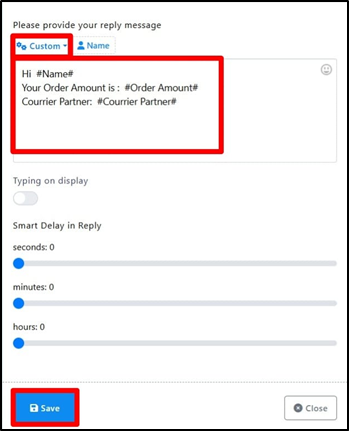
- Save the Bot.
- When the bot sends this message, it will automatically replace the variables with the data fetched from the Google Sheet.
Step 6: Test the Flow:
- Send the trigger keyword to your bot.
- Enter the requested ID (for example, your Order Number).
The bot will:
- Search the Google Sheet
- Fetch the correct row
- Reply with the relevant details
By following these steps, you can successfully connect Google Sheets with BotBee and automatically fetch data to provide accurate, real-time responses to users through your bot.
Reference Video:
If you prefer video tutorials here are the links:
English: https://youtu.be/rwX6cvr_zxE?si=lSWDq0mHGrzRZuTM
Data Fetch Video: https://youtu.be/sPL1M100GIM?si=WsuV6Fyv0aGbzQaQ
Tamil: https://youtu.be/7MIxQoA0G60?si=gbhyO08bcGoStw44
Still Need Help?
If you face difficulties during onboarding:
- Take a screenshot or screen recording.
- Share details with our support team.
Our team will review the onboarding step and guide you further.
Contact: 08069645300
Found this article helpful?
( 1 Out of 2 Found Helpful )