Integrating Google Forms with BotBee
Collecting customer details through Google Forms is easy but following up manually? Not so much. With BotBee, you can fully automate this process. Every time someone submits your form, they instantly receive a WhatsApp notification no manual effort required.
In this guide, you’ll learn how to connect Google Forms to BotBee using webhooks and automate your appointment confirmations seamlessly.
Before connecting anything, you need a form that collects user data.
Step 1: Create Your Google Form:
- Set up your form (for example, an appointment booking form) with all necessary fields.

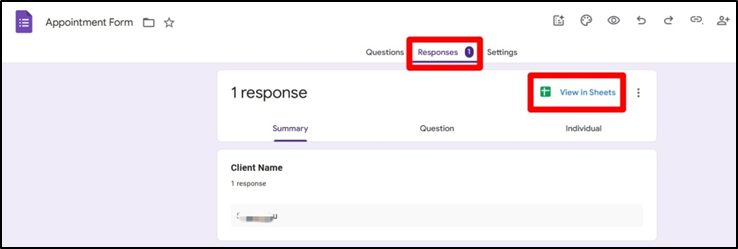
- Go to the Responses tab in your Google Form
- Click on “Link to Sheets”
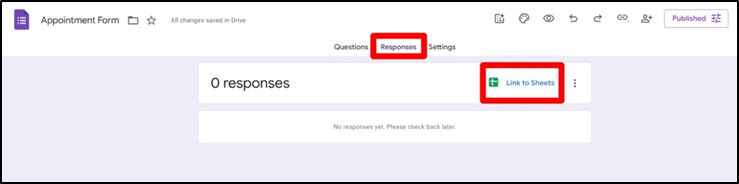
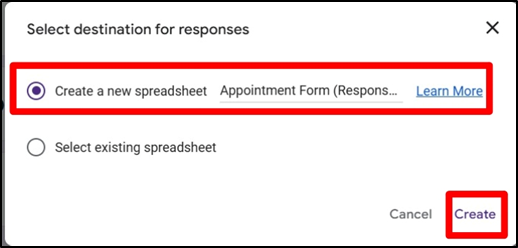
- Create a new spreadsheet to store responses.
Step 2: Create Message Template:
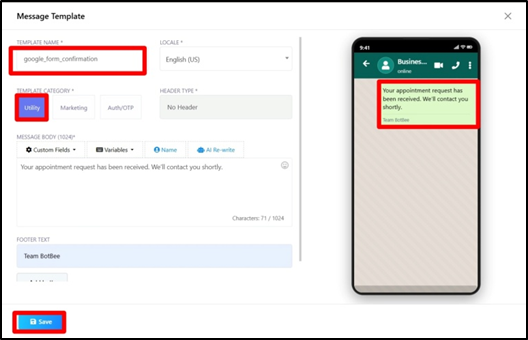
- Go to Bot Manager under WhatsApp in BotBee.
- Create a message template in utility that the users will receive after they submit the form.
- Make sure to get it approved by Meta.
Step 3: Webhook Trigger connectivity:
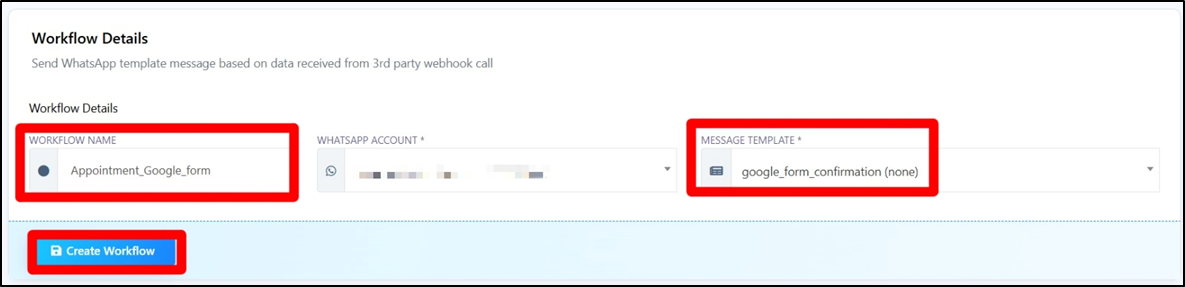
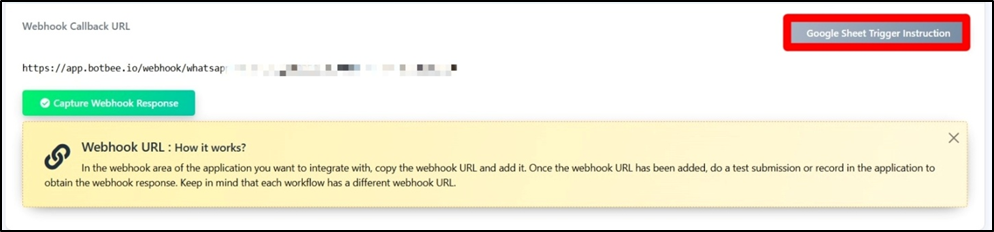
- Go to Webhook Workflow under WhatsApp in BotBee.
- Create a new webhook workflow.
- Enter name and select the template you just made and Click on Save.
- Now Click on “Google Sheet Trigger instruction”
- Copy the whole code.
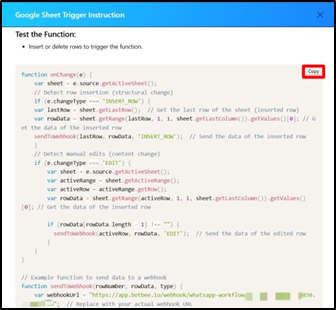
- Open your linked Google Sheet.
- Go to Extensions → App scripts.

- Now paste the copied OnChange Function code and Save it.
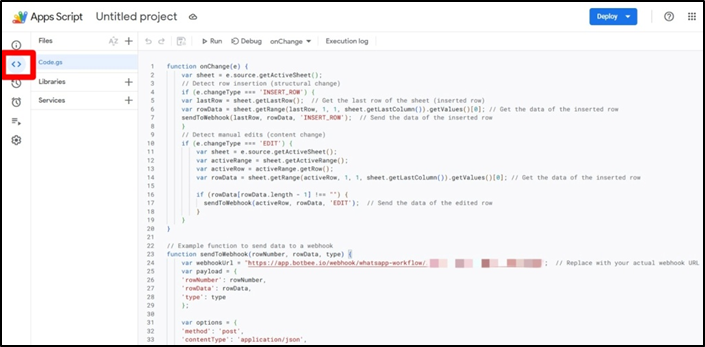
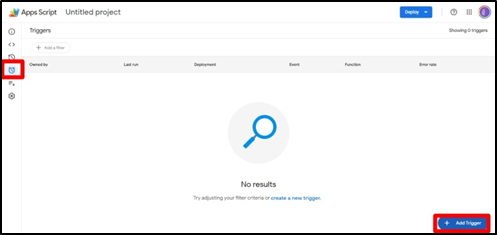
- Now Go to “Triggers” (Alarm Icon).
- Click on “Add Triggers”
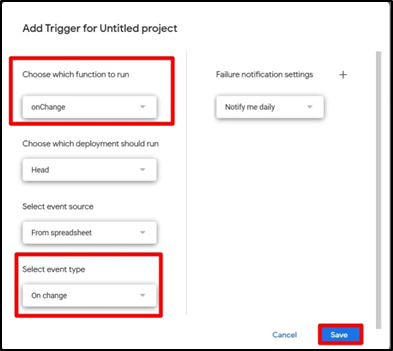
- Set it up for the onChange function, Choosing the event type as On change.
- Click on Save.
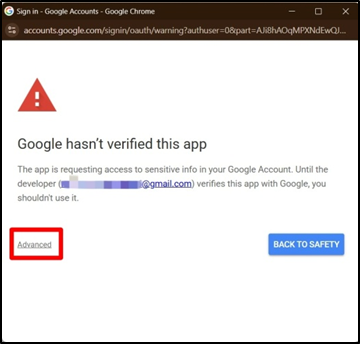
- You will receive a verification warning.
- Click on Advance and Grant all Permissions.
Step 4: Map Data and Test:
- After creating the trigger.
- Fill the Appointment Form and come back to BotBee.
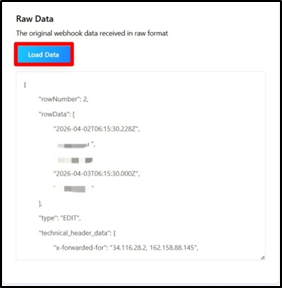
- Click on “Capture Details”. Verify that data is being received correctly.
- Match form fields (like phone number, name) to your message template.
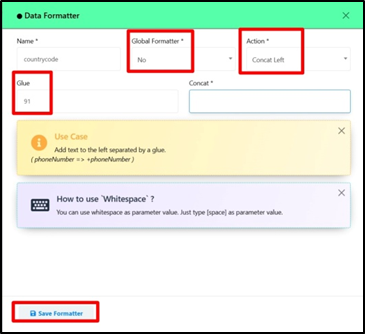
- You can use formatter to add 91 in your Number or remove “+” sign from number.
- Map the data correctly and save the Workflow.
- Ensure the correct data is being used in your WhatsApp message.

Verify Automation:
Once everything is set:
Every new form submission will automatically add the user to your Subscriber Manager. A WhatsApp message will be instantly sent to the user.
Still Need Help?
If you face difficulties during onboarding:
- Take a screenshot or screen recording.
- Share details with our support team.
Our team will review the onboarding step and guide you further.
Contact: 08069645300
Found this article helpful?
( 1 Out of 2 Found Helpful )