Creating a Dynamic List Using HTTP API
Creating dynamic WhatsApp interactive lists allows you to fetch real-time data (like products, services, or listings) and display them directly to users inside WhatsApp. With BotBee, you can easily connect your bot to external platforms like WooCommerce using an HTTP API and build powerful, automated experiences.
This guide walks you through the complete process step by step.
Step 1: Create Custom Fields:
Before building your bot flow, you need to set up custom fields to store dynamic data.
- Go to Subscriber Manager → Manage.
- Click on Manage Custom Fields.

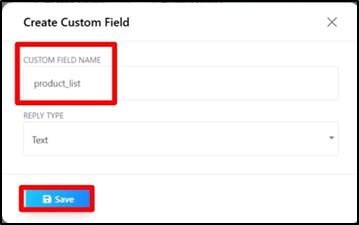
Create the following fields:
- Product List: This will store the JSON response fetched from your WooCommerce store.
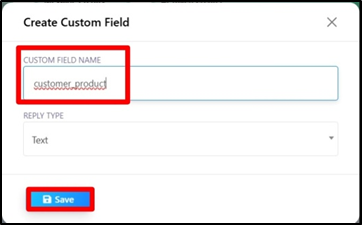
- Customer Selected Product List: This will store the product selected by the user from the list.
These fields act as temporary storage for dynamic data during the conversation.
Step 2: Set Up Bot Flow and HTTP API:
Now, create the bot flow and connect it with your data source.
- Navigate to Bot Manager → Bot Reply → Create
- Add a trigger keyword and name your flow.
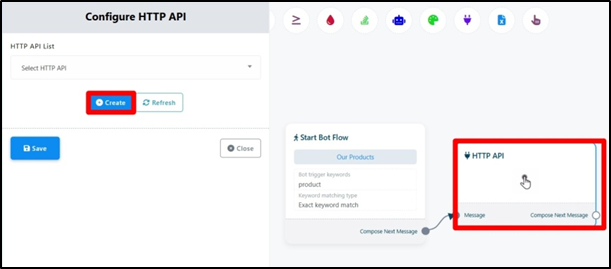
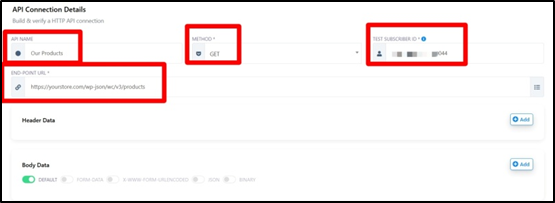
Add HTTP API Element:
- Give a name for HTTP API
- Method: GET
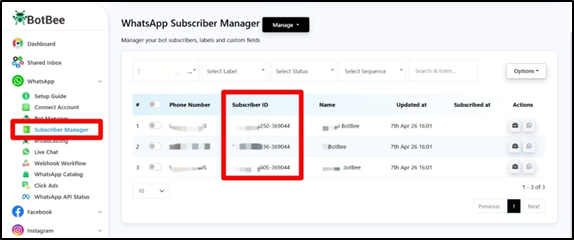
- Add a test subscriber ID (for testing purposes)
- To get the Subscriber ID, Go to Subscriber Manager. Add a number for testing purpose and you will see the the Subscriber ID there. Copy it.
- Endpoint URL: Use your WooCommerce API endpoint.
- Go to WooComerce API document and Select list all product if you want you can select particular product category.
- Also include your website URL before the endpoint.
- Example: https://yourstore.com/wp-json/wc/v3/products
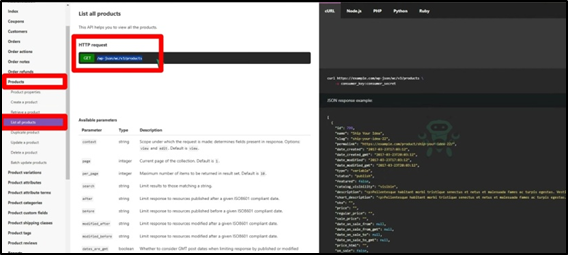
This endpoint will fetch all product data dynamically.
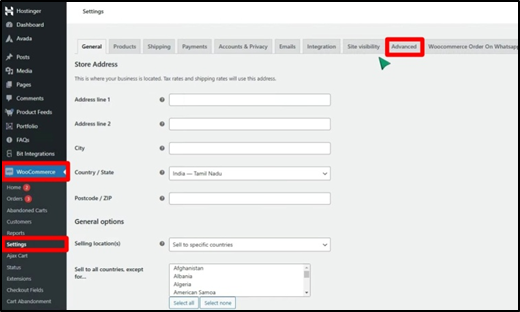
Step 3: Authenticate with WooCommerce:
To securely fetch data, you need to connect your WooCommerce API.
- In WooCommerce: Go to Settings → Advanced → REST API
- Click Add Key.
- Give a Description, here we have used “productlist”.
- Permissions: Read/Write
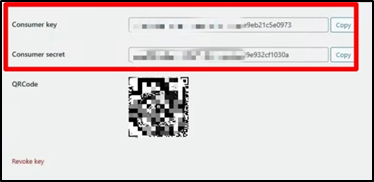
- Click on Generate API Key.
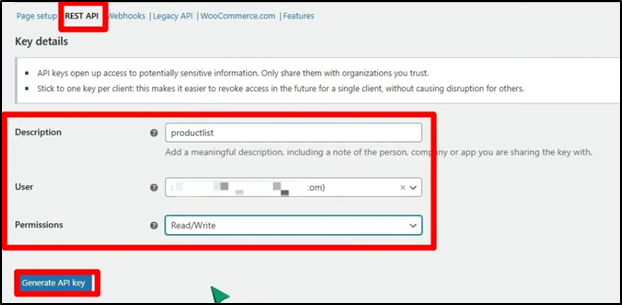
- You will get Consumer key and Consumer Secret. Come back to BotBee.
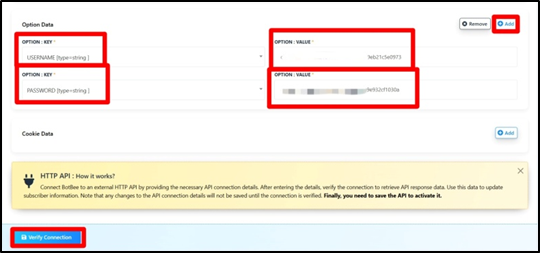
- Click on “Add” beside “Option Data”.
- Select Key as USERNAME and in Value Paste the Consumer Key.
- Click on Add again.
- Select Key as PASSWORD and in Value Paste the Consumer Secret.
- Click Verify Connection.
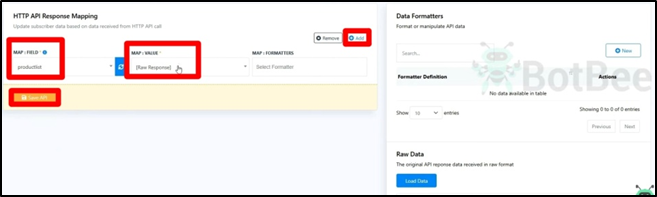
Once verified:
- You’ll receive a JSON response.
- Map the Data, Click on Add.
- Field: productlist (Custom Field)
- Value: Raw Response.
- Save the API configuration.
Step 4: Configure the Dynamic List Message:
Now comes the main part, displaying the dynamic list.
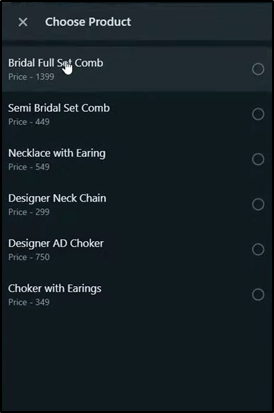
- Add an Interactive Element in the Bot → List Message.
- Enable Row Generation Method as Dynamic.
- Custom Field for Dynamic Rows: Select the Product List custom field.
- Row Title: Map to name (from JSON)
- Row Description Format: You can write row and description and also provide the dynamic information , we will use product list custom value and description price.
- Save Selection to Custom Field: Choose what data to store. (e.g.customer product)
- Key Index for Saved Value: product link
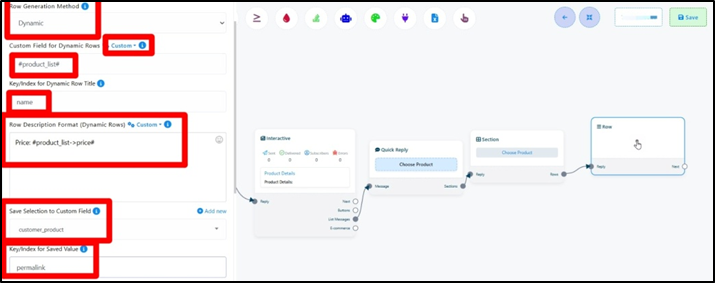
- Save the element and Add a confirmation message.
- This makes the experience seamless and personalized.
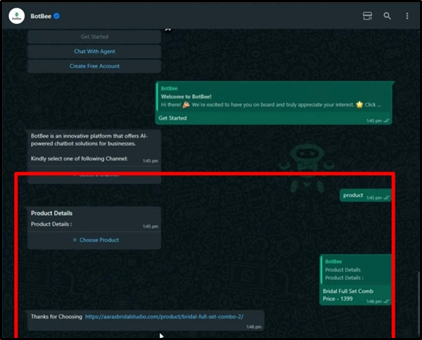
Final Output
Once everything is set up:
- The bot fetches live product data from WooCommerce
- Displays it as an interactive WhatsApp list.
- Captures user selection.
- Responds with relevant product details instantly.
Conclusion
Dynamic lists powered by HTTP APIs unlock a whole new level of automation in WhatsApp marketing and customer experience. Whether you're showcasing products, services, or menus, this setup ensures your users always see up-to-date information without manual updates.
With BotBee, building these intelligent workflows is simple, scalable, and incredibly effective.
Reference Video:
If you prefer video tutorials here are the links:
English: https://youtu.be/Xd1nLsckfZs?si=jO-a6-2TWBUtrMhm
Still Need Help?
If you face difficulties during onboarding:
- Take a screenshot or screen recording.
- Share details with our support team.
Our team will review the onboarding step and guide you further.
Contact: 08069645300
Found this article helpful?
( 0 Out of 0 Found Helpful )