In today’s fast-paced digital landscape, automation is the key to faster communication and better customer experience. With BotBee’s API Developer Dashboard, you can easily send WhatsApp messages whether it’s for notifications, reminders, or customer engagement.
This guide walks you through the complete process of sending template messages using BotBee’s API.
Step 1: Creating Message Template:
Let’s start by making a template you want to send first.
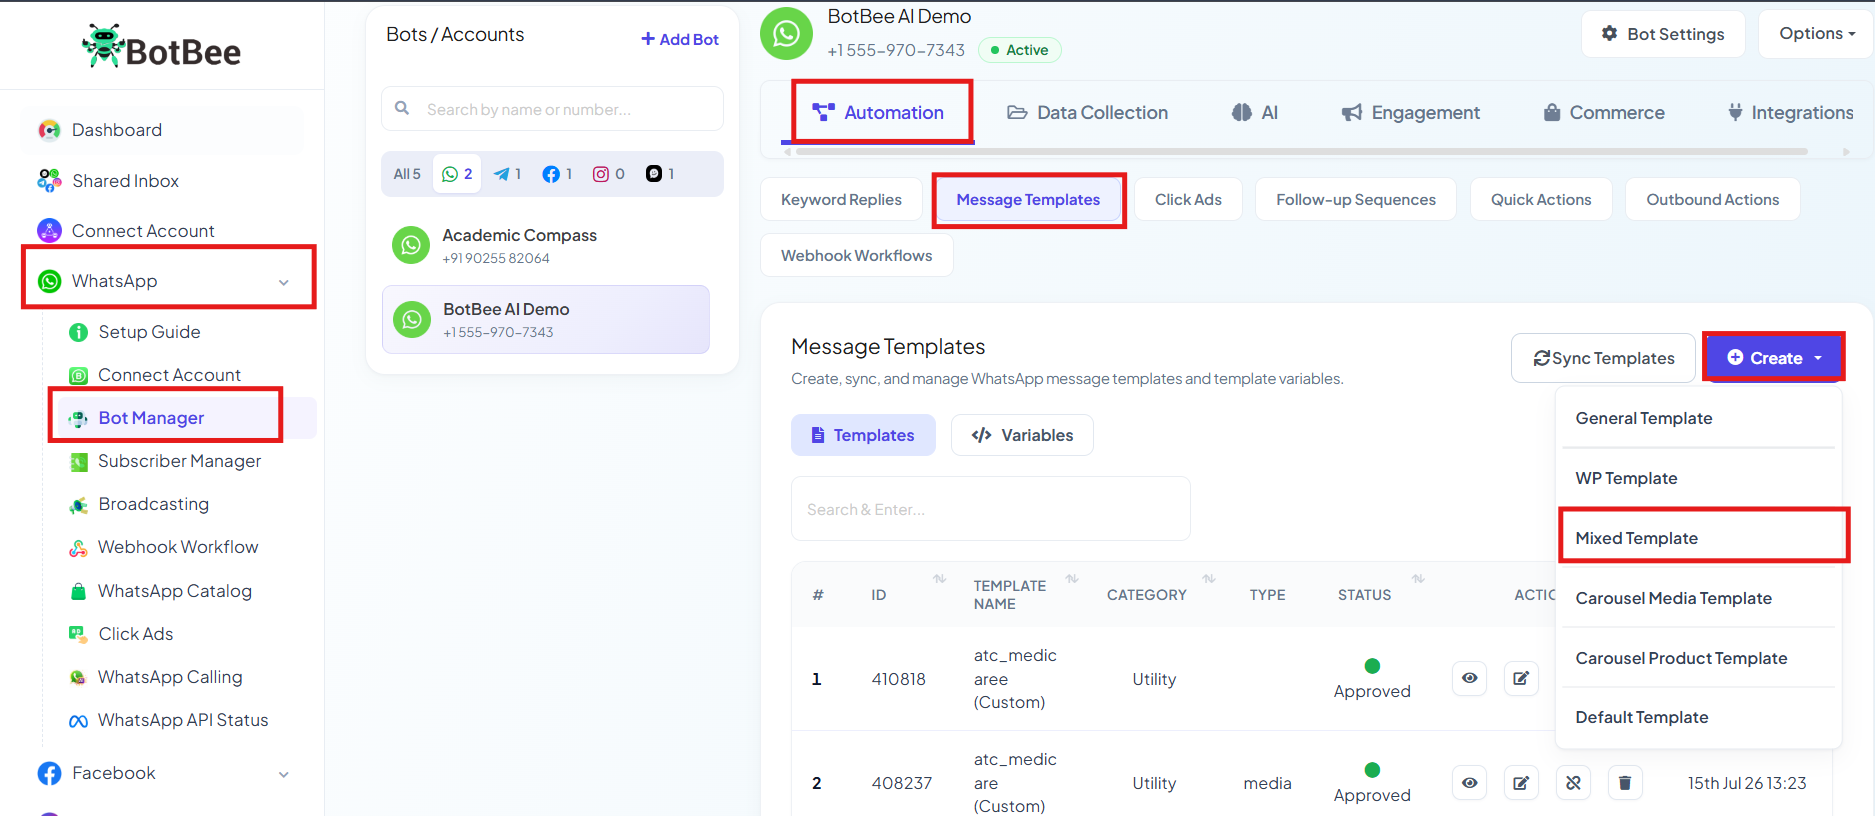
- Go to Bot Manager under WhatsApp.
- Go to Message Templates under Automation Section.
- Click on Create → Mixed Templates.
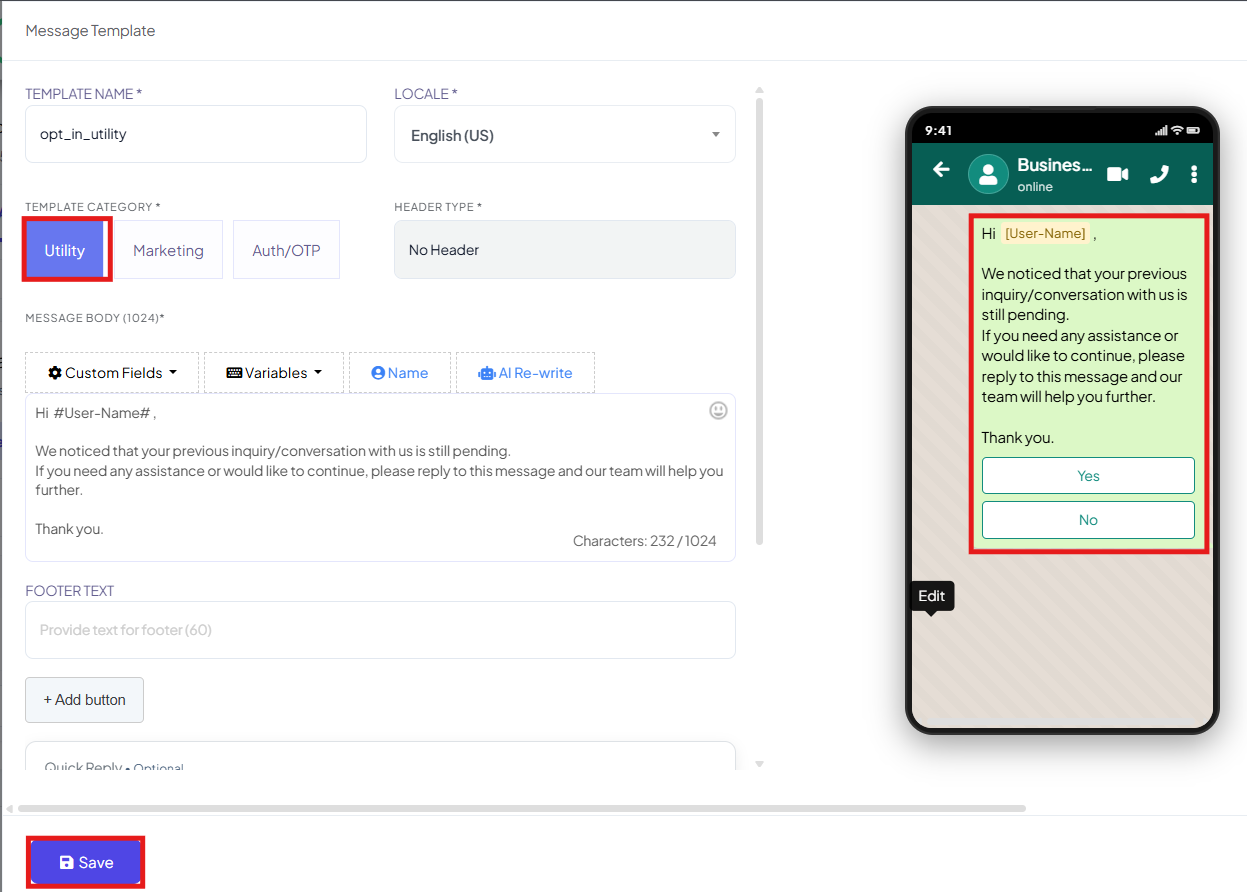
- Make your messages more engaging with interactive features:
- Quick Reply Buttons: Assign a Bot Reply to each button
- When a user clicks a button, it triggers an automated response
- Make sure these bot replies are created in advance
- These elements help turn simple messages into interactive conversations.
- Save the template and get it Approved.
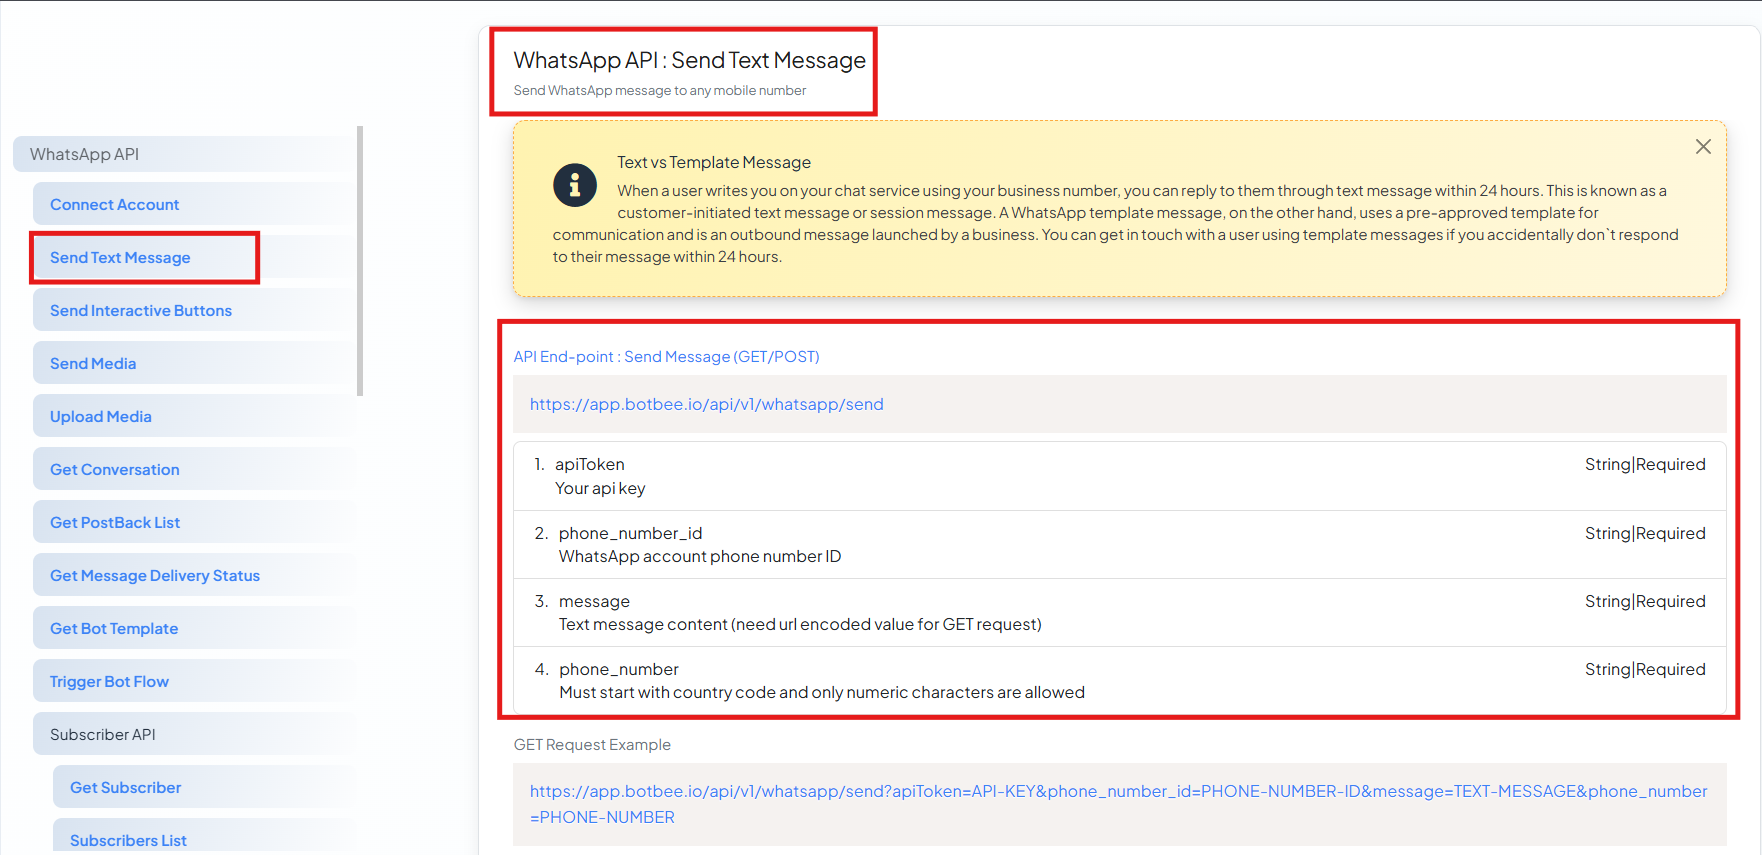
Step 2: Access the API Developer Dashboard:
- Head to the top-right corner and select the API Developer option.

- From the left-hand sidebar, click on Send Message.
This section is your control center for configuring and sending WhatsApp messages via API. Before sending messages, it's important to know the two types available:
- Session Messages: These are regular messages you can send within a 24-hour window after the user’s last interaction.
- Template Messages: These are pre-approved messages required when:
- Starting a new conversation
- Messaging after the 24-hour window expires.
Step 3: Configure the API Endpoint:
Now it’s time to set up your message request:
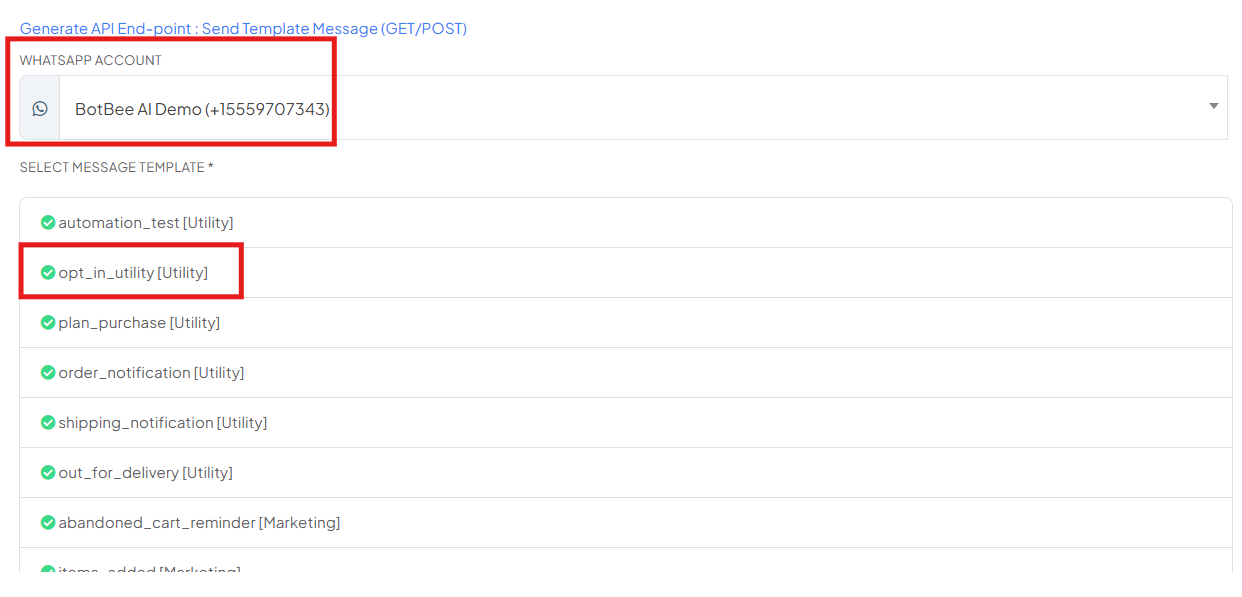
- Go to the Generate API Endpoint section
- Choose Send Template Message (GET or POST)
- Select your WhatsApp account.
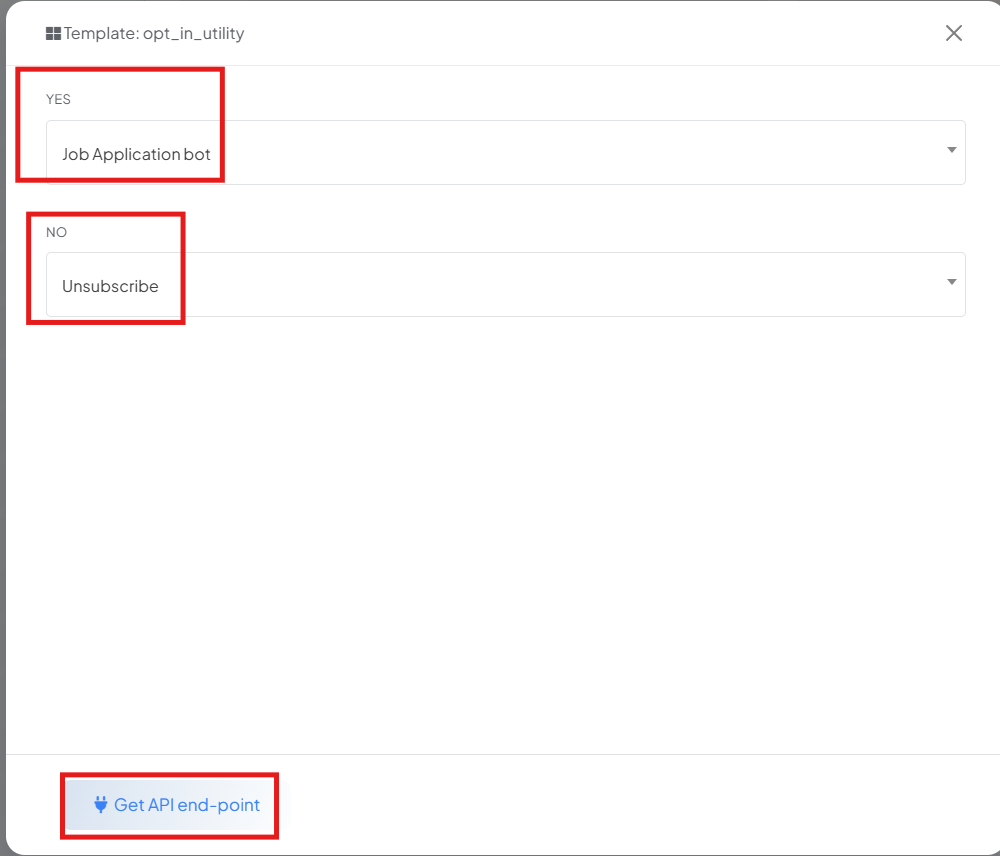
- Then, select an approved message template.
- The template includes an image in the header and two quick reply buttons in the footer.
- Now for the quick reply buttons, you need to select a bot reply. When a user clicks on the button, it will automatically trigger that specific response. Before selecting it, make sure you have already created the bot reply.
- After that, go ahead and select the header image.
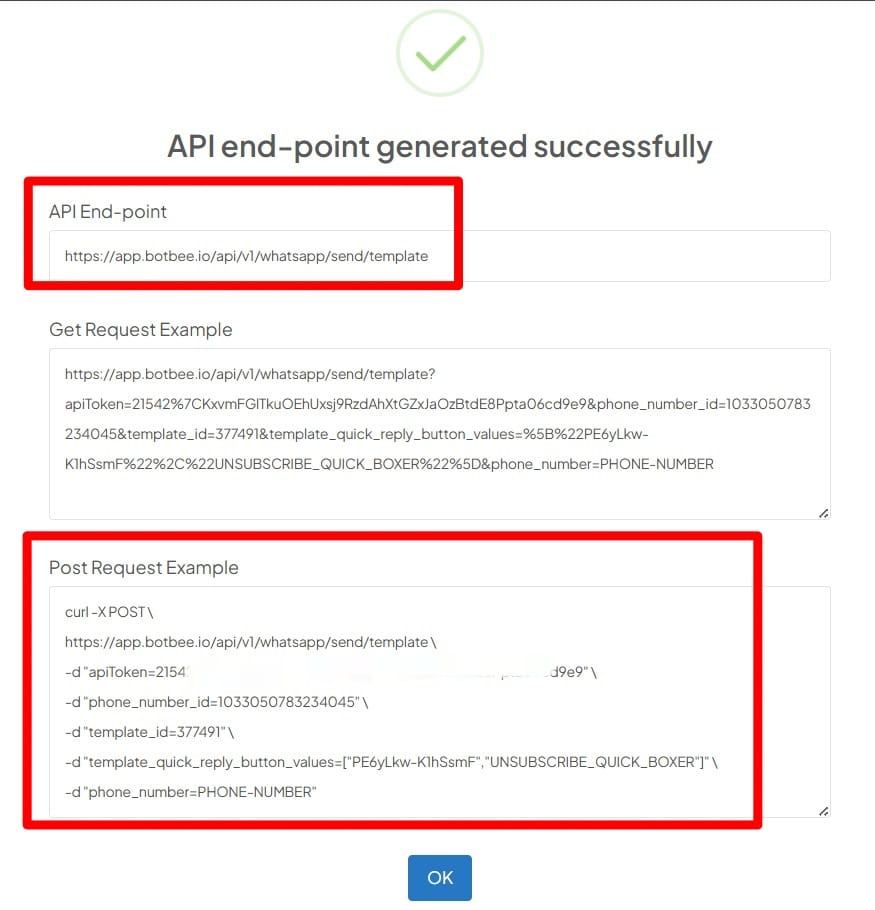
- Now select the get API endpoints.
You will be given GET and POST request URL. This step defines what message will be sent and through which account.
Step 4: Generate and Test the API URL:
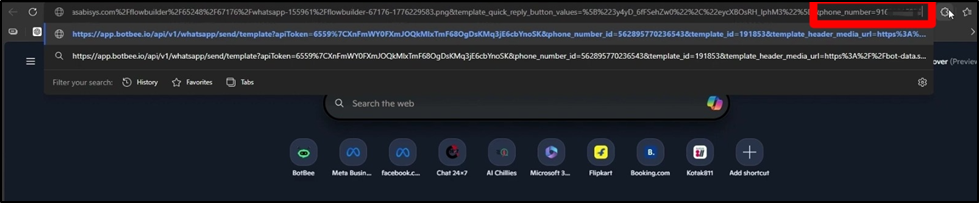
- Copy the generated request URL and Paste it into your browser.
- Replace the placeholder with the user’s phone number
- Hit Enter to send the message
This allows you to quickly test your setup without needing additional tools.
Step 5: Verify the Result:
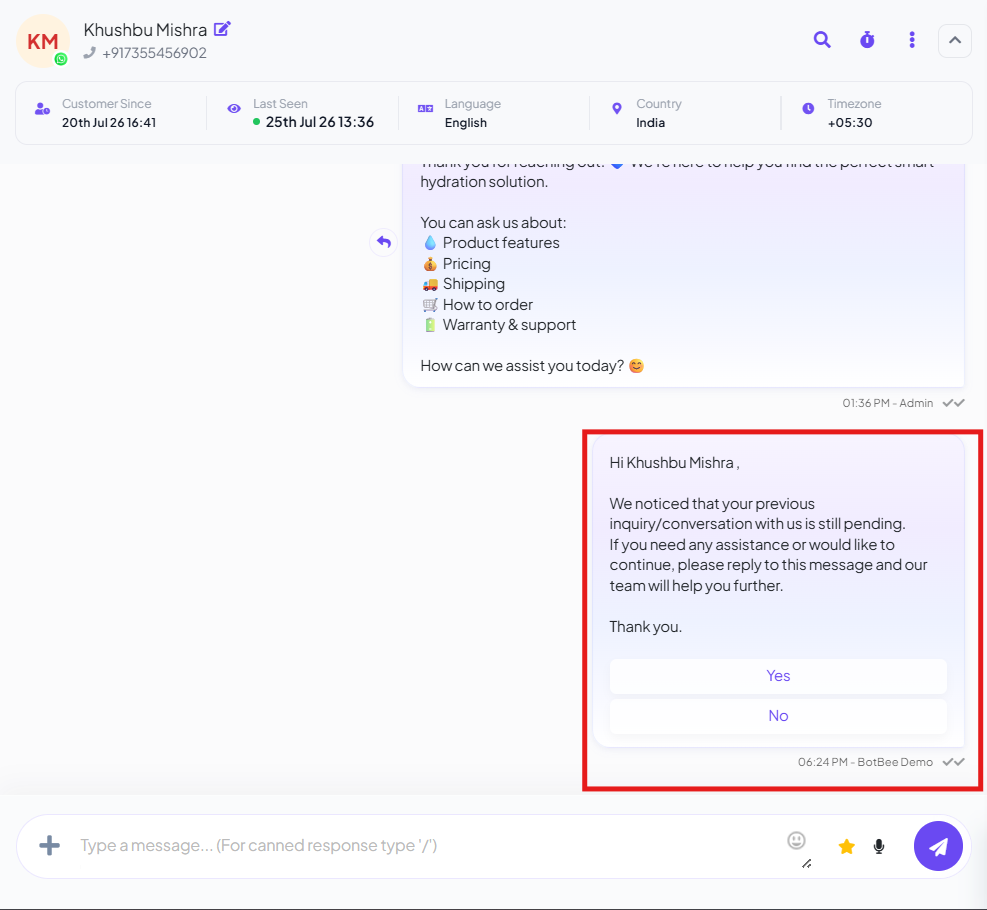
- Finally, confirm everything is working correctly:
- Go to the Shared Inbox and Check if the message was delivered successfully
- Click on the buttons in the message to ensure they trigger the correct bot replies
- Testing ensures a smooth experience before deploying it at scale.
BotBee’s API makes sending WhatsApp messages simple, flexible, and powerful. From setting up templates to adding interactive buttons, you can automate conversations that feel personal and responsive.
Once you’ve mastered this flow, you can integrate it into CRMs, lead systems, or any automation workflow saving time while improving customer engagement.
Reference Video:
If you prefer video tutorials here are the links:
English: https://youtu.be/HbozW1wOqTI?si=_2sgG_SMobt2RrvO
Hindi: https://youtu.be/UNxQunpkU88?si=eGc1VJ42XNVhWc2m
Still Need Help?
If you face difficulties during onboarding:
- Take a screenshot or screen recording.
- Share details with our support team.
Our team will review the onboarding step and guide you further.
Contact: 08069645300
Found this article helpful?
( 1 Out of 2 Found Helpful )