Sending Facebook Leads to Google Sheets & Send WhatsApp Messages
If you’re running lead generation campaigns on Facebook, speed matters. The faster you follow up, the higher your chances of converting that lead into a customer. This guide walks you through a simple yet powerful automation: capturing Facebook leads, syncing them to Google Sheets, and instantly sending them a WhatsApp message using BotBee.
Let’s break it down step by step.
Step 1: Connect Facebook Leads to Google Sheets:
Start by linking your Facebook lead forms directly to a Google Sheet.
- Go to BotBee Dashboard → Connect Account under WhatsApp.
- Scroll down to your profile and Click Manage.
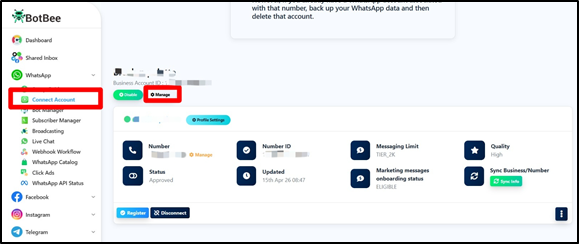
- You will be redirect to Business Overview.
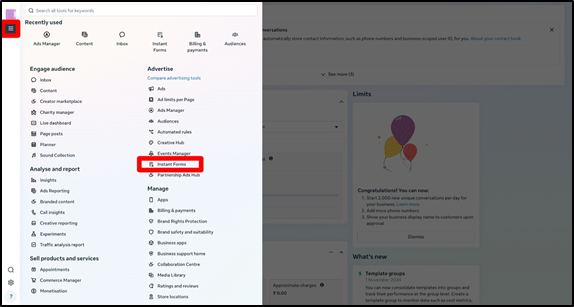
- From the left side menu, Click on All Tools → Instant Forms.
- Open the CRM Setup tab and choose Google Sheets.
- Sign in with your Google account.
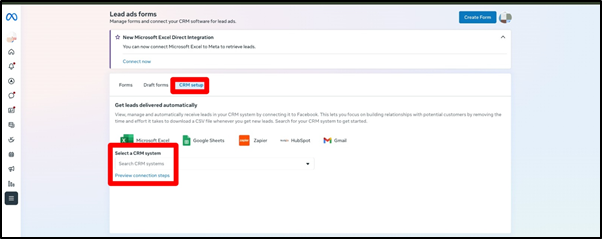
- Click on New Integration.
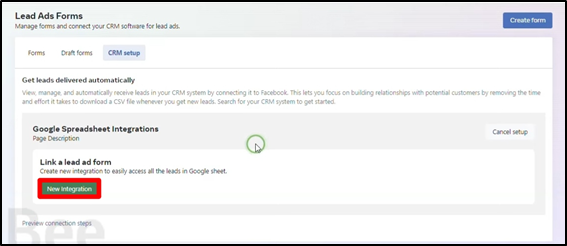
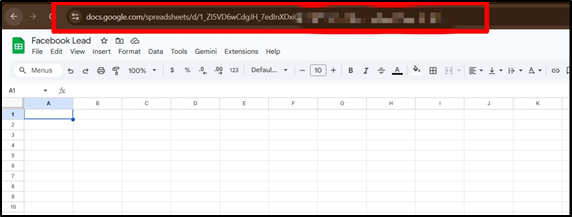
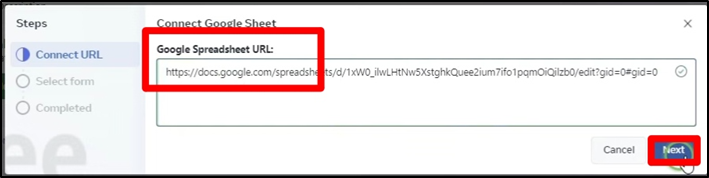
- Copy your Google Sheet URL and paste it into the setup field.
- Grant the required permissions .
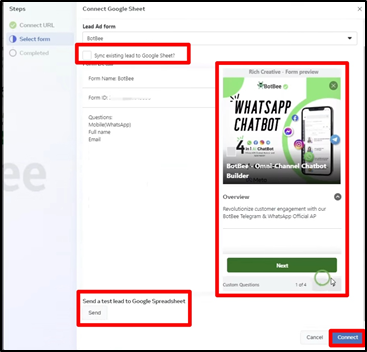
Now map your data:
- Select the specific sheet and lead form you want to track.
- Optionally you can enable syncing for existing leads.
- Click Send Test Lead and Click to View to confirm everything is working correctly.
Once done, every new Facebook lead will automatically appear in your Google Sheet.
Step 2: Set Up BotBee Webhook & WhatsApp Template:
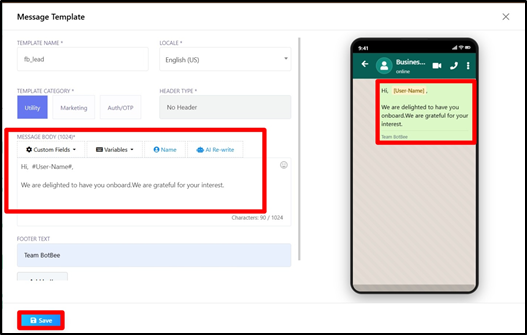
- In BotBee, Go to Bot Manager → Message Template.
- Click on Create → Mixed Templates.
- Create and get approval for your WhatsApp message template.
- Go to Webhook Workflow under WhatsApp.
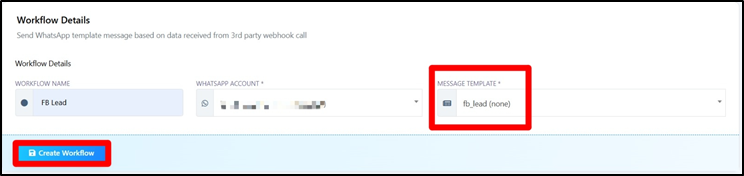
- Click on Create and give your workflow a name.
- Select the template you just created and Click on Create Workflow.
- You will get a URL.
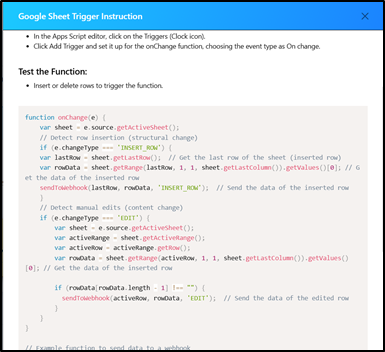
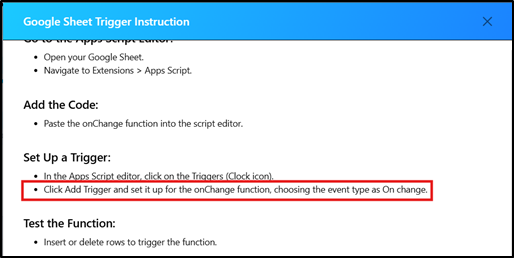
- Click on Google Sheet Trigger Instruction.
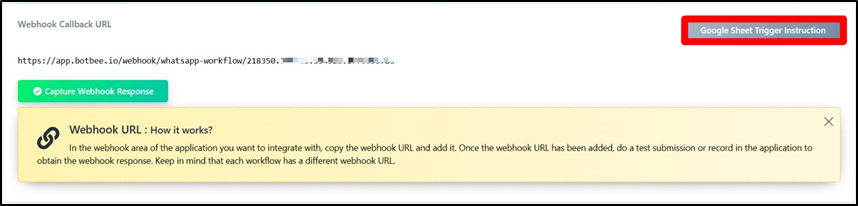
- Copy the script you get.
Step 3: Configure Google Apps Script:
- Open your Google Sheet.
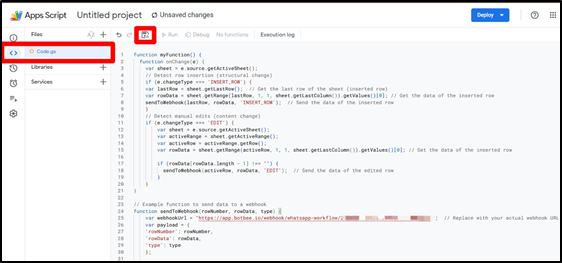
- Go to Extensions → Apps Script

- Paste the script you copied and Save it.
- In Apps Script, go to Triggers
- Click Add Trigger
Configure it like this:
- Check the webhook instructions to change the function and Event Type.
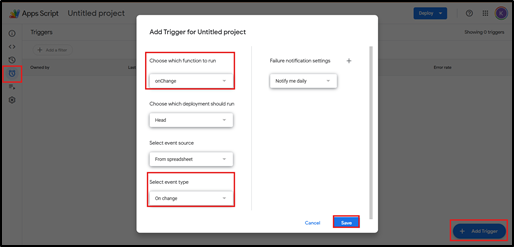
- Click Save.
To test:
- Add sample data in your Google Sheet.
- Check if the script runs and captures the data.
Step 5: Data Formatting & Final Test:
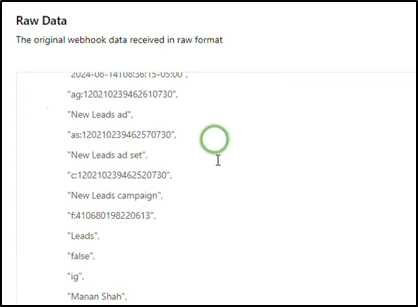
- In BotBee, Click on Capture Webhook Response.
- You will get your Raw Data.
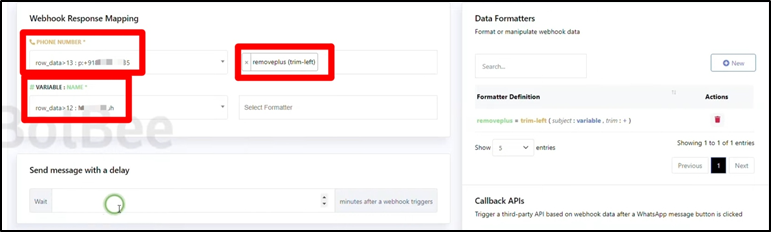
Now Map the fields:
- Phone Number: You can use formatter to add 91 in your Number or remove “+” sign from number.
- Name
- If you want, you can assign the labels to the leads.
- Save the workflow.
Now test the full flow:
- Add a new sample lead in your Google Sheet.

- If everything is set up correctly:
- Data hits the BotBee webhook
- WhatsApp message is automatically sent to the lead.
Why This Setup Matters
This automation removes manual work and ensures instant engagement with your leads. Instead of waiting hours (or worse, forgetting to follow up), your system responds in seconds.
That’s a huge advantage when your competitors are still doing things manually.
Final Thoughts
With Facebook lead ads, Google Sheets, and BotBee working together, you’ve essentially built a real-time lead response system. It’s simple, scalable, and incredibly effective for improving conversions.
Once this is running, you can take it further add follow-up sequences, reminders, or even AI-driven conversations.
Reference Video:
If you prefer video tutorials here are the links:
English: https://youtu.be/FxBwFJd3ZfI?si=lnGn9fJAVQnGNxYW
Still Need Help?
If you face difficulties during onboarding:
- Take a screenshot or screen recording.
- Share details with our support team.
Our team will review the onboarding step and guide you further.
Contact: 08069645300
Found this article helpful?
( 0 Out of 0 Found Helpful )