Sending WooCommerce Order Alerts to Seller’s WhatsApp
If you want to receive instant order alerts on WhatsApp whenever a customer places an order on your WooCommerce store, you can automate this using BotBee. This setup sends order details like Order ID, total price, and product list directly to the seller’s WhatsApp.
Follow these steps to configure it.
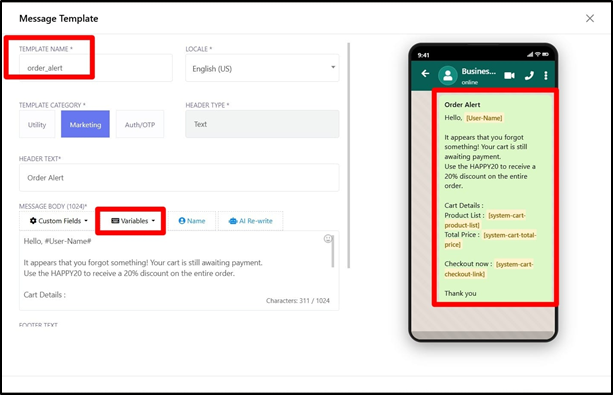
Step 1: Create a Message Template:
- Go to Bot Manager → Message Template.
- Click Create and enter a name for your template.
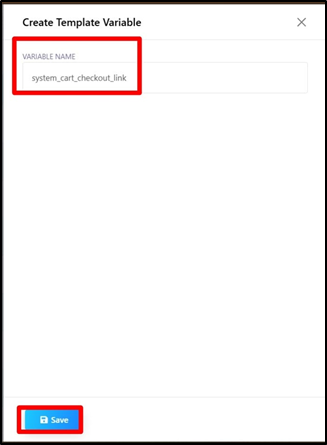
- Write the message body and include variables for dynamic data.
- Common variables include: Order ID, Total Price, Product List
- Click Save and wait for the template to be approved by WhatsApp.
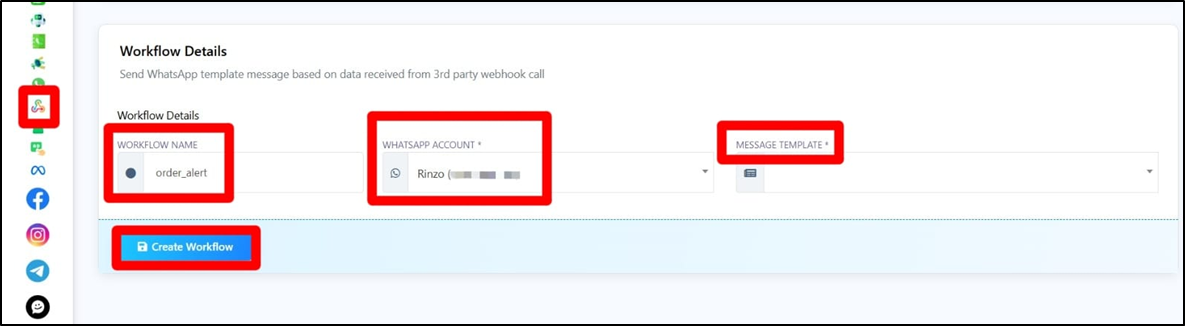
Step 2: Set Up the Webhook Workflow in BotBee:
- Go to Webhook Workflow under WhatsApp and click Create.
- Enter a workflow name.
- Select the message template you created earlier.
- Choose the WhatsApp account that will send the message.
- Click Create Workflow.
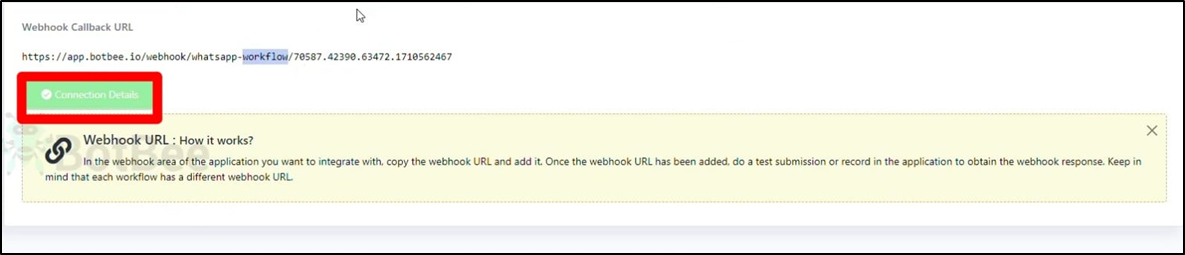
- BotBee will generate a unique Webhook URL.
- Copy this URL, as it will be required in WooCommerce.

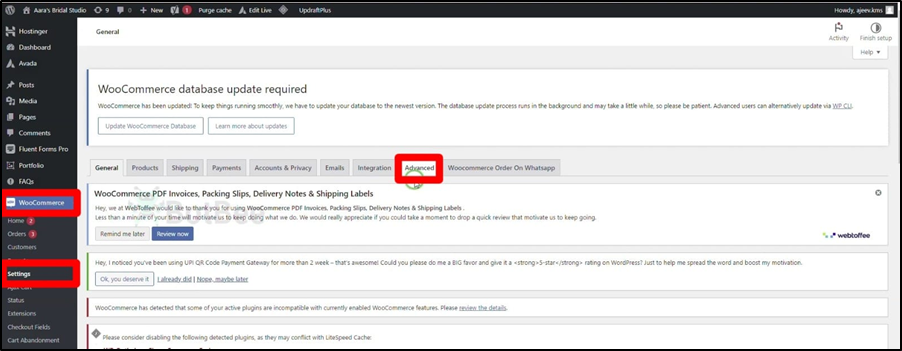
Step 3: Configure WooCommerce Webhook:
- Log in to your WooCommerce Admin Panel.
- Navigate to Settings → Advanced → Webhooks.
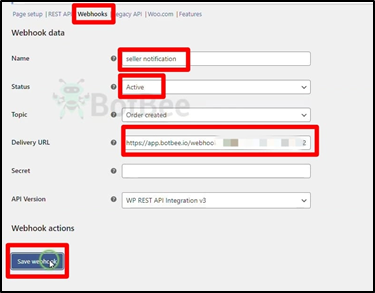
Click Add Webhook and configure the following:
- Name: Any recognizable name
- Status: Active
- Topic: Order Created
- Delivery URL: Paste the Webhook URL copied from BotBee
- Click Save Webhook.
- Go back to BotBee and click on Capture Webhook Response.

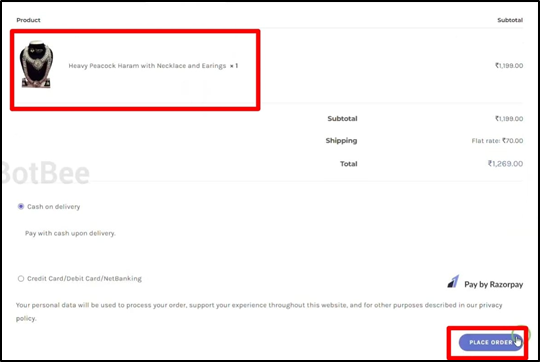
Step 4: Place a Demo Order (Testing):
- Open your WooCommerce store.
- Add a product to the cart.
- Go to checkout.
- Place a test order using dummy details.
- Now go back to BotBee, after the data will be captured successfully it will change to Connect Details.
Step 5: Webhook Response Mapping:
- After configuring the WooCommerce webhook and placing a test order, the next step is Webhook Response Mapping. This step ensures that the data received from WooCommerce is correctly connected to the variables used in your WhatsApp message template.
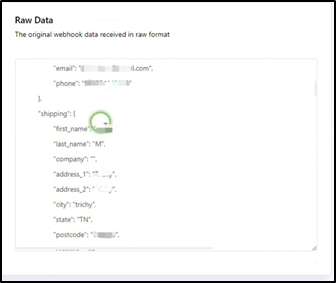
- When WooCommerce sends order information to BotBee, it sends the data in JSON format. Response mapping allows you to select specific fields from this data and link them to the variables defined in your template.
- Once the webhook is triggered, you will see the sample response data received from WooCommerce.
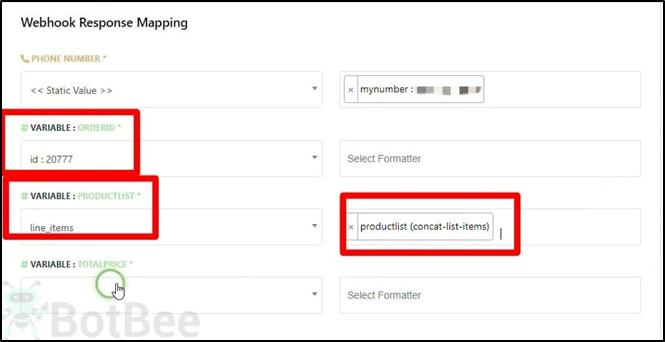
- Now we have to configure the web hook response mapping in the phone number field.
- We have to select the phone number we have to select the seller’s phone number in this case.
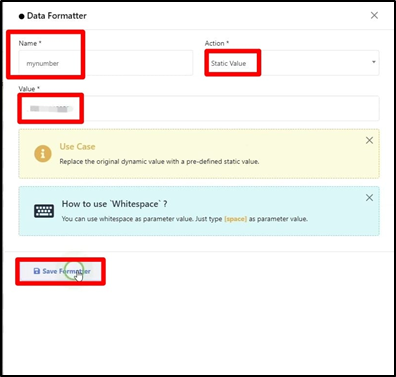
- We will use a static value we have to use a formatter for the phone number field, Now select the formatter from the list.
- Now select the value for the order ID variable.
- Search for ID and select it.
- Then select a value for the product list variable it is line items under the list items.
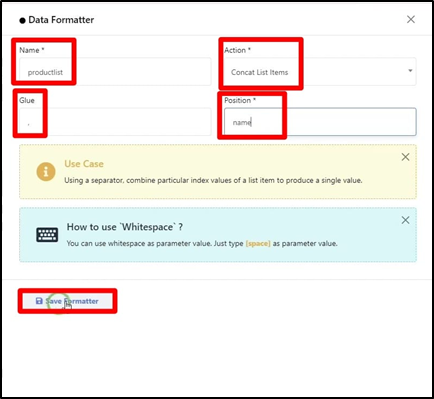
Line items may have multiple items so we will have to use a formatter.
- Name: Give a name to the formatter.
- Action: concat list items
- Glue: Put a comma sign “,”
- Position: name
Save the formatter now.
- Select the formatter that we have just created.
- Then select a value for the total price variable
- Search for total and select it.

- Finally click on the save workflow.
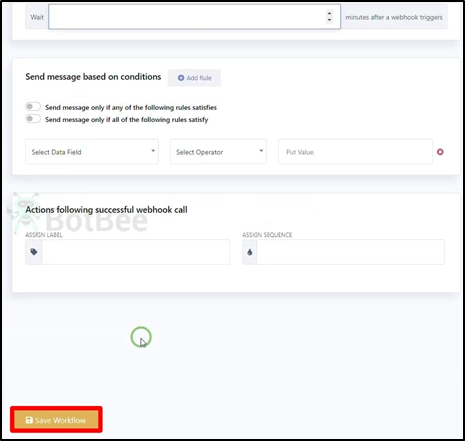
Whenever a new order is created on your WooCommerce store, the seller will receive a new order alert.
Reference Video:
If you prefer video tutorials here are the links:
English: https://youtu.be/jTRRO-YvmIU?si=w-JmEW_etrG0U3VX
Still Need Help?
If you face difficulties during onboarding:
- Take a screenshot or screen recording.
- Share details with our support team.
Our team will review the onboarding step and guide you further.
Contact: 08069645300
Found this article helpful?
( 0 Out of 0 Found Helpful )