Sending WooCommerce Order Updates on WhatsApp
Keeping customers informed about their orders is one of the most important parts of running an online store. Sending order updates directly on WhatsApp helps businesses deliver real-time notifications, improve customer experience, and reduce support queries.
With BotBee’s WooCommerce automation, you can automatically send WhatsApp notifications whenever a customer places an order on your store.
BotBee allows you to send WooCommerce order updates on WhatsApp using two different methods depending on your requirements.
Method 1: Using Default Templates:
Step 1: Select Your Message Templates:
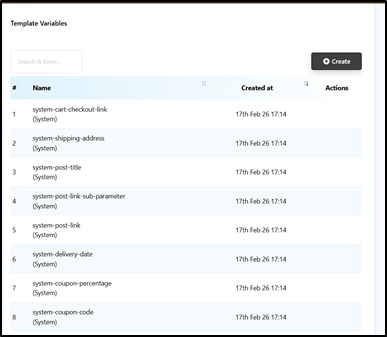
- BotBee automatically generates variables and default templates that you can use for order notifications.
- To get the default templates, Go to Message templates in Bot Manager.
- Click on Create then Default Templates.
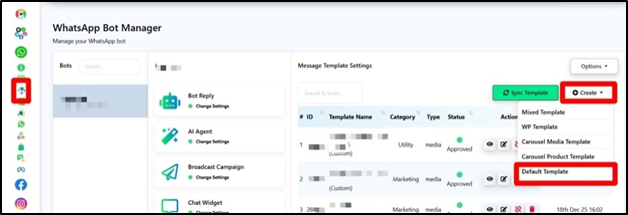
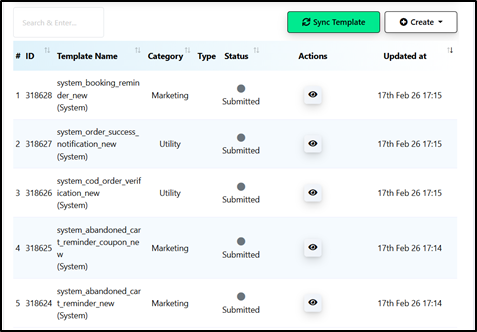
- The system will show default template along with pre made variables.
- Confirm that the template status is Approved.
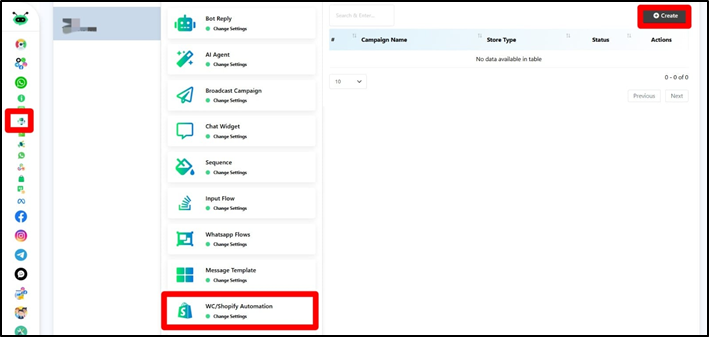
Step 2: Create the Automation Campaign:
- In the Bot Manager, Scroll down and click on “WC/Shopify Automation”
- Click Create to start a new automation campaign.
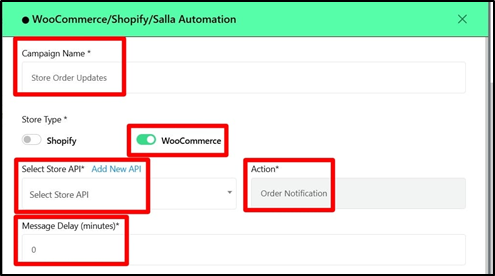
Configure Campaign Details
Fill in the following details:
- Campaign Name: Give your campaign a clear name so it is easy to recognize later.
- Store Type & API: Select WooCommerce as the store type and Choose your connected Store API.
- Action (Trigger): Select Order Notification as the trigger.
- This means the automation will run whenever a new order is placed.
- Message Delay: By default, the delay is set to 0 minutes, which sends the message instantly.
- You can increase this if you want a short buffer before the notification is delivered.
Step 3: Map Variables and Templates:
Now you need to configure how the message will be sent.
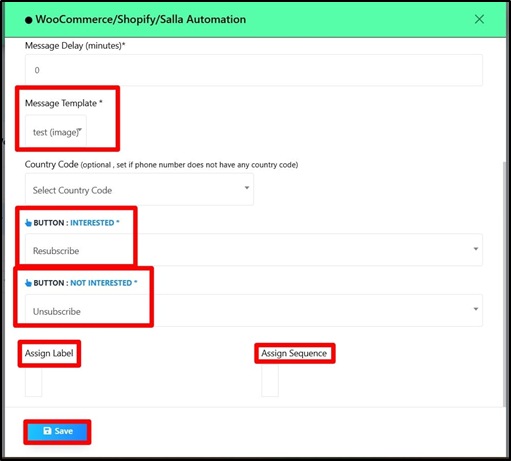
Template Selection:
- BotBee automatically selects the appropriate message template based on the Action you chose earlier.
- This template will include variables that dynamically insert order information into the message. This message contains two buttons:
- Interested Button: Select a Post-back flow that will trigger when the customer clicks the Interested button. This can be used to show order details, tracking info, or connect with support.
- Not Interested Button: Select a Post-back flow for when the customer clicks the Not Interested button. This can trigger actions like ending the conversation or stopping further follow-ups.
Delivery Logic:
- You will see a variable called system_delivery_after_days.
- Enter a static number (for example, 5) if you want to inform customers when their package will likely arrive.
- Leave this field blank if you do not want to include delivery timing.
User Organization (Optional):
- You can assign a Label to the user.
- You can also add them to a Sequence.
- This helps you organize customers for future marketing campaigns or follow-up messages.
Method 2: Using Custom Templates with Webhook Integration:
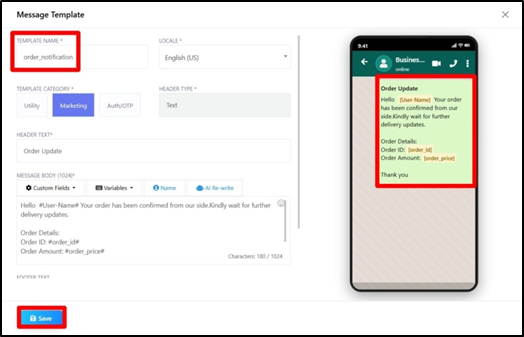
Step 1: Create custom message template:
- Go to Bot Manager → Message Template.
- Click Create and enter a name for your template.
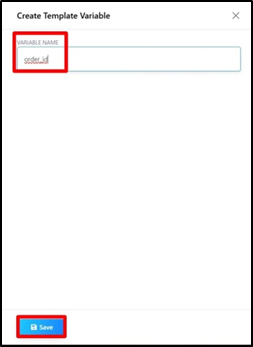
- Write the message body and include variables for dynamic data.
- Common variables include: Order ID, Order Price, Order Quantity.
- Click Save and wait for the template to be approved by WhatsApp.
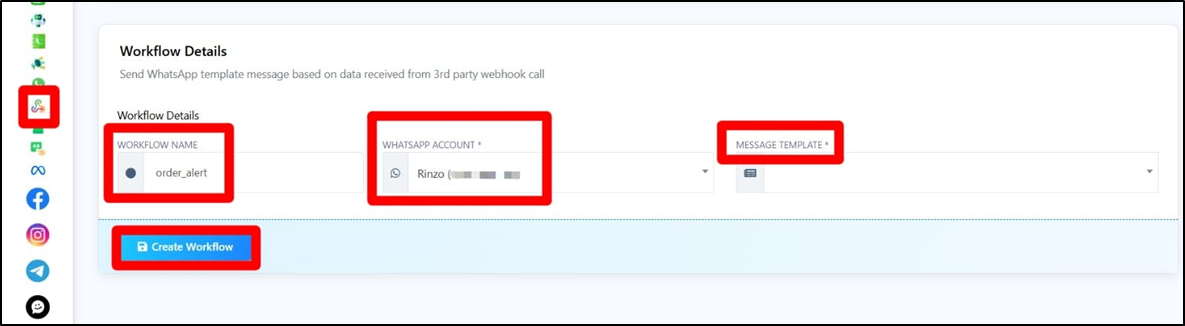
Step 2: Set Up the Webhook Workflow in BotBee:
- Go to Webhook Workflow under WhatsApp and click Create.
- Enter a workflow name.
- Select the message template you created earlier.
- Choose the WhatsApp account that will send the message.
- Click Create Workflow.
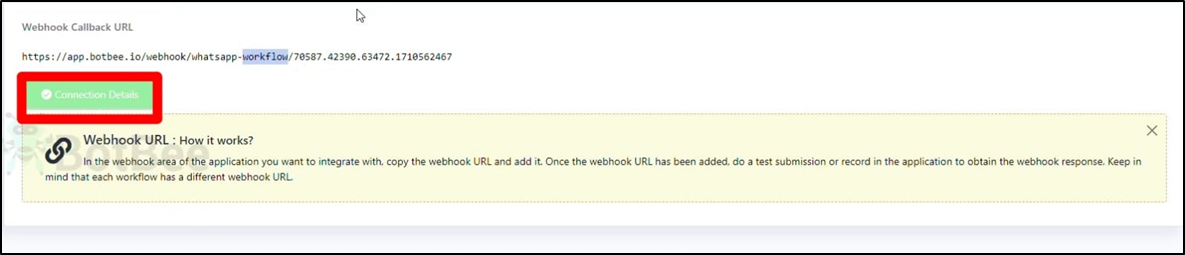
- BotBee will generate a unique Webhook URL.
- Copy this URL, as it will be required in WooCommerce.

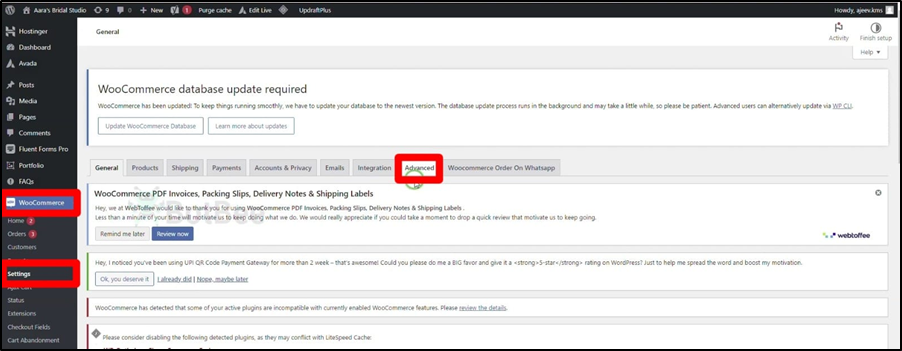
Step 3: Configure WooCommerce Webhook:
- Log in to your WooCommerce Admin Panel.
- Navigate to Settings → Advanced → Webhooks.
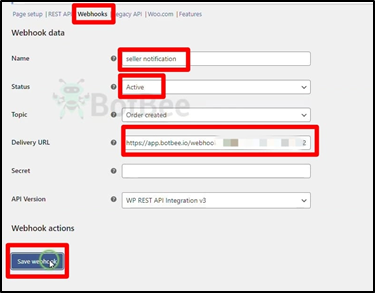
Click Add Webhook and configure the following:
- Name: Any recognizable name
- Status: Active
- Topic: Order Notification
- Delivery URL: Paste the Webhook URL copied from BotBee
- Click Save Webhook.
- Go back to BotBee and click on Capture Webhook Response.

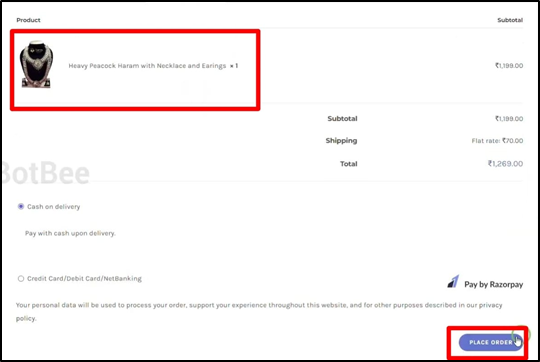
Step 4: Place a Demo Order (Testing):
- Open your WooCommerce store.
- Add a product to the cart.
- Go to checkout.
- Place a test order using dummy details.
- Now go back to BotBee, after the data will be captured successfully it will change to Connect Details.
Step 5: Webhook Response Mapping:
- After configuring the WooCommerce webhook and placing a test order, the next step is Webhook Response Mapping. This step ensures that the data received from WooCommerce is correctly connected to the variables used in your WhatsApp message template.
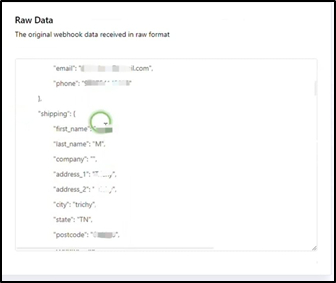
- When WooCommerce sends order information to BotBee, it sends the data in JSON format. Response mapping allows you to select specific fields from this data and link them to the variables defined in your template.
- Once the webhook is triggered, you will see the sample response data received from WooCommerce.
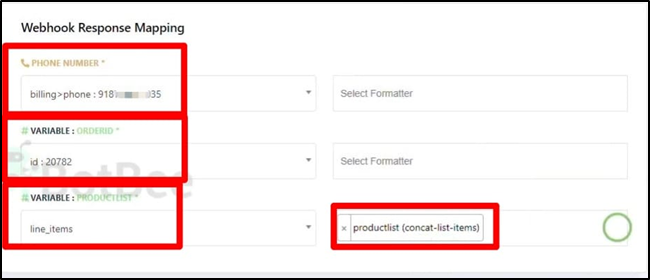
- Now we have to configure the web hook response mapping in the phone number field.
- We have to select the phone number from JSON data, here it's under the billing.
(Note: The number should be shown without the “+” sign. if the number appears with a “+” sign in the output json, use a formatter and apply trim left to remove the “+” sign.)
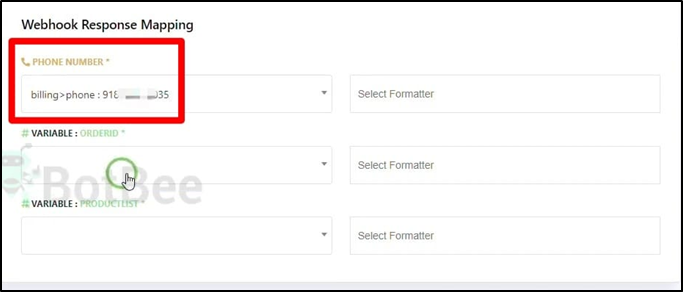
- Now select the value for the order ID variable.
- Search for ID and select it.
- Then select a value for the product list variable it is line items under the list items.
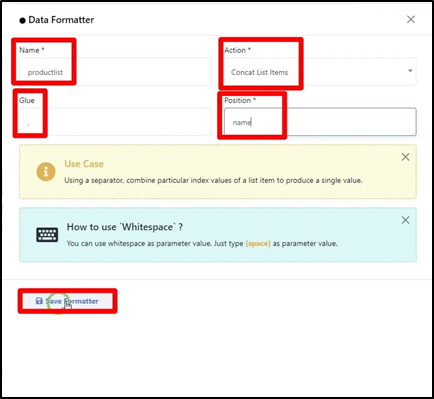
Line items may have multiple items so we will have to use a formatter.
- Name: Give a name to the formatter.
- Action: concat list items
- Glue: Put a comma sign “,”
- Position: name
Save the formatter now.
- Select the formatter that we have just created.
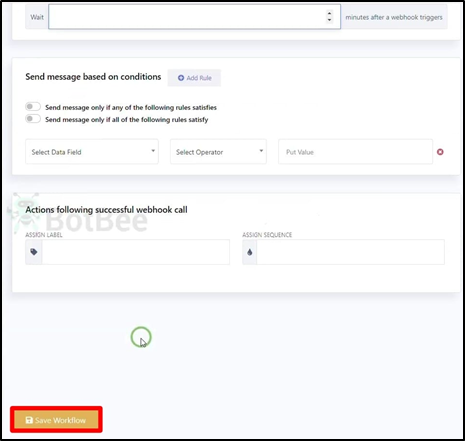
- Then select a value for the total price variable.
- Search for total and select it.
- Finally click on the save workflow.
Once configured, every new order will automatically trigger a WhatsApp notification, helping you provide faster communication and a better shopping experience.
Reference Video:
If you prefer video tutorials here are the links:
Method 1: https://youtu.be/_InXCap_LE8
Method 2: https://youtu.be/j_5Ttet4DlY
Still Need Help?
If you face difficulties during onboarding:
- Take a screenshot or screen recording.
- Share details with our support team.
Our team will review the onboarding step and guide you further.
Contact: 08069645300
Found this article helpful?
( 0 Out of 0 Found Helpful )