How to Build a WhatsApp Chatbot
Chatbots have become an essential tool for businesses to provide instant responses, automate customer support, and improve user engagement. With BotBee, creating a WhatsApp chatbot does not require coding knowledge. Using its visual drag-and-drop flow builder, you can design interactive conversations, share media, collect user information, and even connect users to human agents.
In this article, you’ll learn step by step how to build a WhatsApp chatbot using BotBee and understand the key features involved explained in simple terms.
Step-by-Step Guide to Creating a WhatsApp Chatbot:
Step 1: Start in the Bot Manager:
- Begin by logging into your BotBee dashboard.
- Navigate to Bot Manager.
- Click on Create.
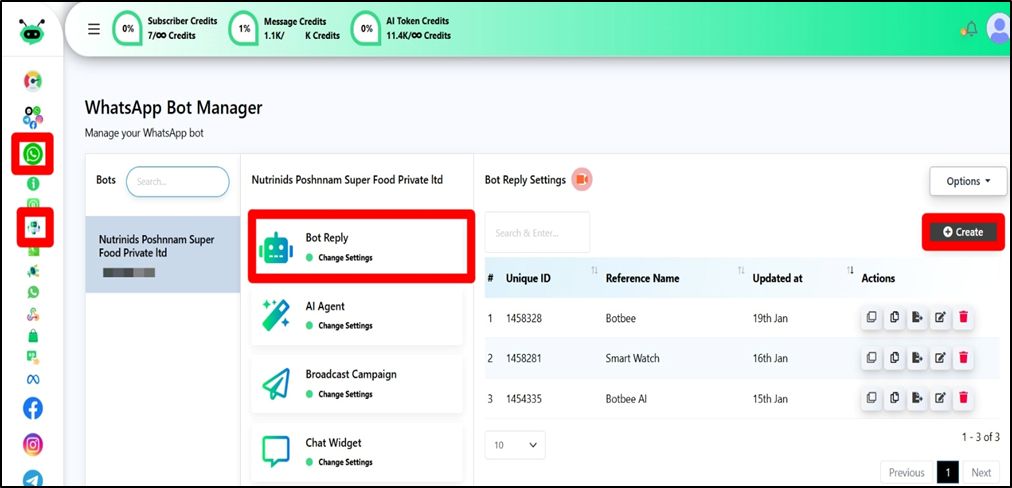
- This opens the Visual Drag and Drop Flow Builder, where you design your chatbot’s conversation.
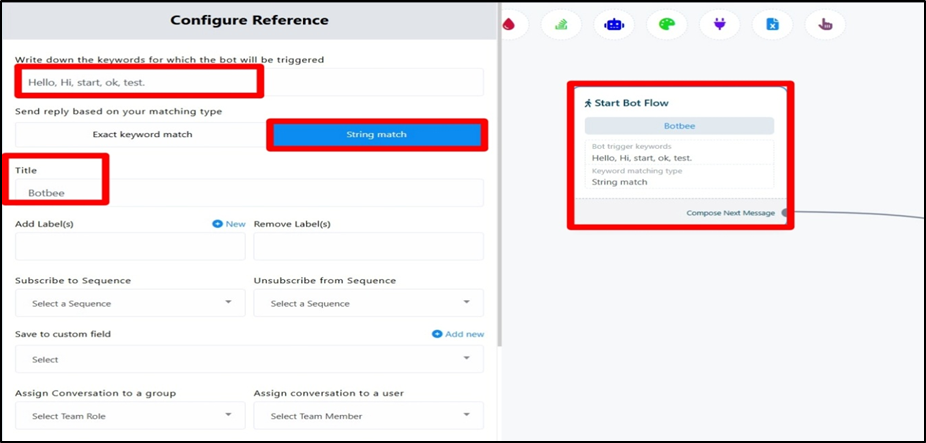
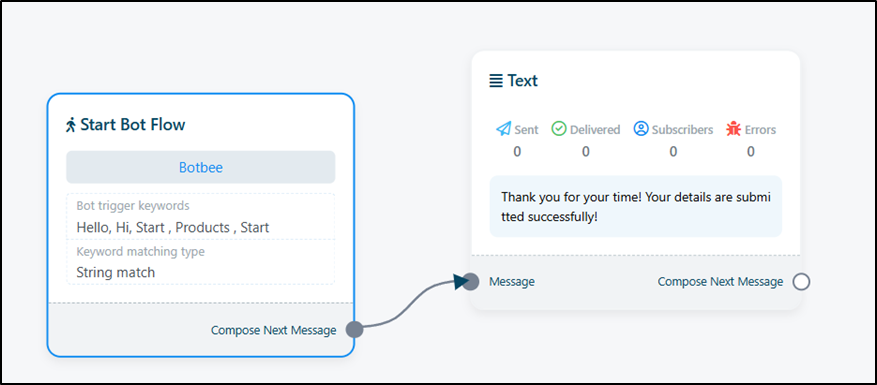
Step 2: Set Triggers:
- Triggers define when your Chatbot should start responding.
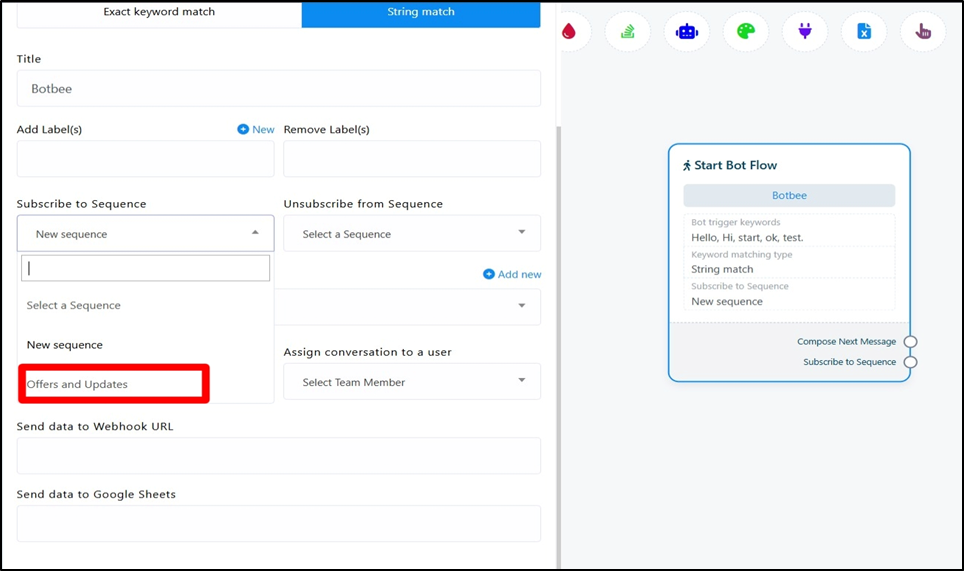
- Click on “Start Bot Flow” and Add keywords such as “hello”, “hi”, or “hey”.
Trigger Matching Options:
- Exact Keyword Match: The chatbot starts only when the user types the exact keyword (e.g., typing hello exactly).
- String Match: The chatbot starts even if the keyword appears within a longer message (e.g., hello there, hi bot, can you help?).
(Note: String Match is recommended for a smoother user experience, as users don’t need to type precise words.)
- Name your bot under the title section and Click on “Save”. (Example: BotBee)
- Drag and Drop from “Compose Next Message”, a Menu will open showing which box you want to add next.
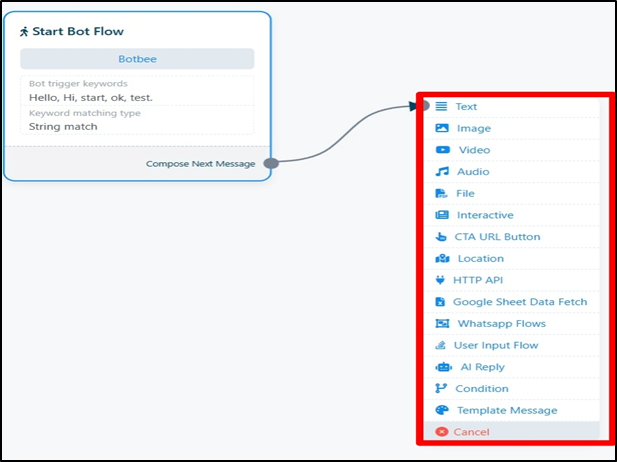
Text Element:
- The Text Element in BotBee is designed only for sending plain text messages.
- Buttons cannot be added inside or after a Text Element.
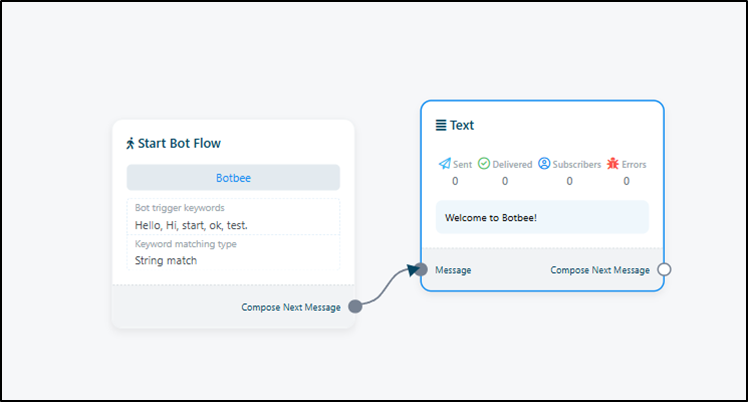
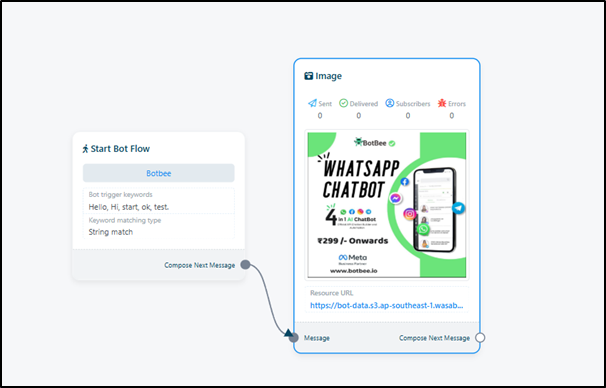
Image Element:
- The Image Element is used to send an image to the user on WhatsApp.
- It can contain only an image in jpg or png format.
- Maximum supported file size is 16MB.

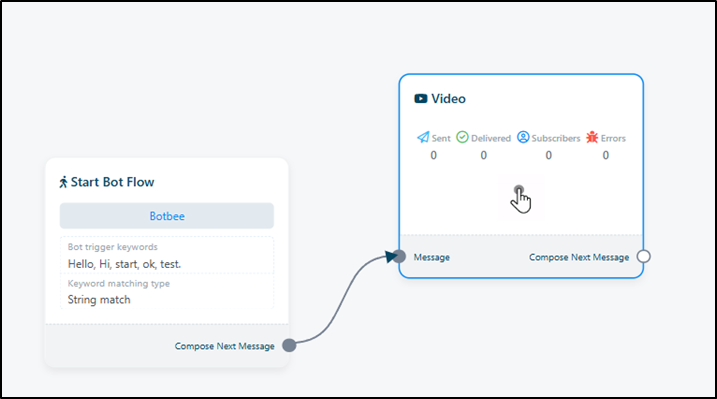
Video Element:
- It can contain only a video in mp4 format.
- Maximum supported file size is 16MB.
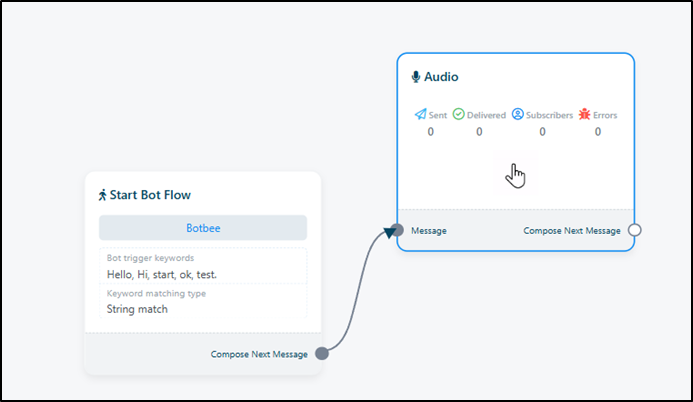
Audio Element:
- The Audio Element allows you to send an audio message to the user.
- It can contain only an audio file mp3 format.
- Maximum supported file size is 16MB.
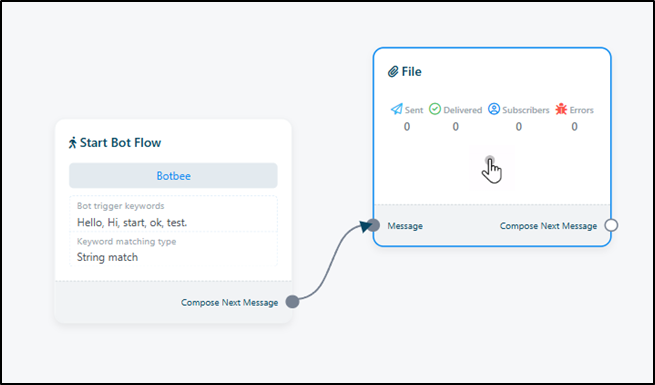
File Element:
- The File Element is used to send documents or downloadable files.
- It can contain only one file in doc, docx, pdf, txt, ppt, pptx, xls, xlsx format.
- Maximum supported file size is 16MB.
Interactive Element:
- The Interactive Element is used to create actionable messages that allow users to interact with your chatbot.
- You can add text and an image together.
- You can add buttons for quick user responses. (Upto 3 buttons)
- You can add lists for multiple selectable options. (Upto 10 list objects)
- The Header Section is important and is required to be filled.
- You can display e-commerce catalogs for product-based interactions.
(Note: You can’t end a Chatbot just after an Interactive element.)

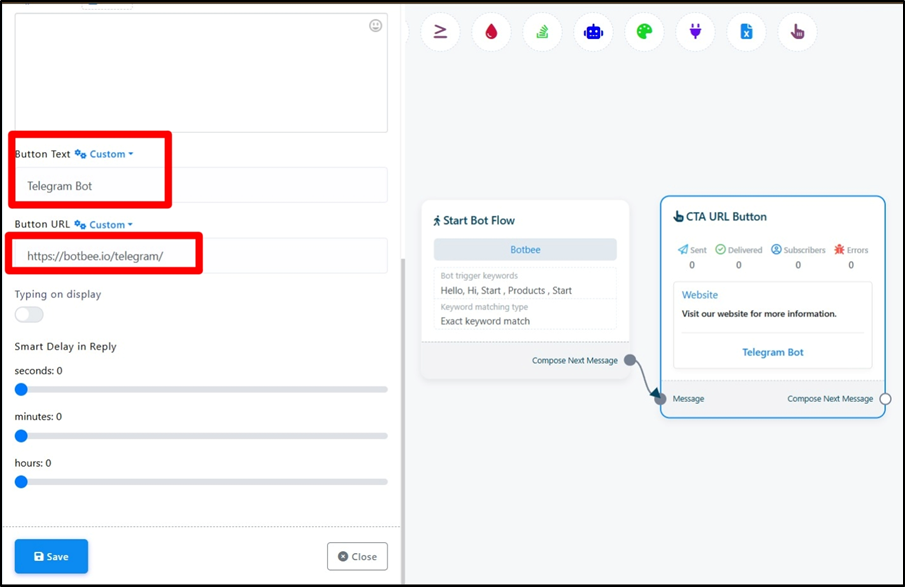
CTA URL Element:
- The CTA (Call-To-Action) URL Button is used to redirect users to an external link.
- Opens a website, payment page, form, or booking link.
- Works as a clickable action button.
- Best for payments, registrations, website visits, and external forms.
Location Element:
- The Location Element allows you to share a physical location with the user.
- Sends map coordinates and address details.
- Opens directly in the user’s map application.
- Helps users navigate to your business easily.

HTTP API Element:
- The HTTP API element allows your chatbot to connect with external systems and services using API requests.
- Sends and receives data from third-party platforms.
- Fetches live information such as order status, booking details, user records, or CRM data.
- Enables system-to-system communication in real time.
- Works as a backend integration layer for automation.
- Best used when your chatbot needs to interact with external software, databases, or business systems.

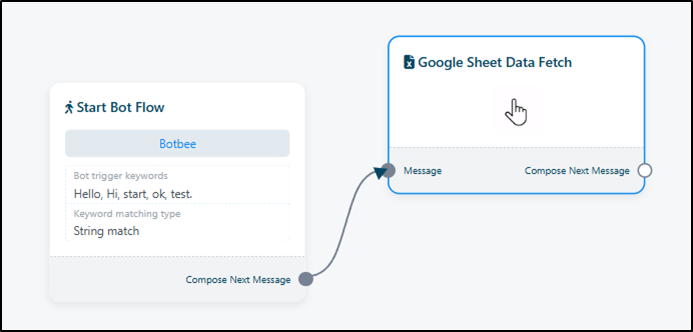
Google Sheet Data Fetch element:
- The Google Sheet Data Fetch element is used to retrieve data directly from a connected Google Sheet and send it to the user in real time.
- Fetches data from a specific Google Sheet and column.
- Displays dynamic information such as prices, availability, schedules, or booking details.
- Updates automatically when the Google Sheet data changes.
- Does not support buttons on its own.
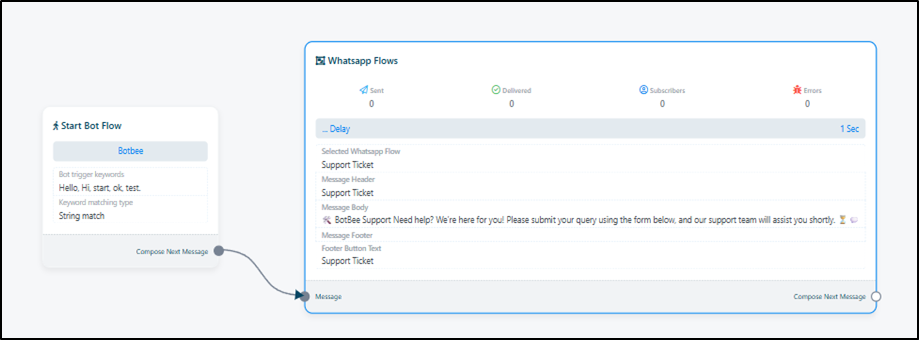
WhatsApp Flows element:
- The WhatsApp Flows element is used to collect structured information from users through a form-like interface, similar to a Google Form.
- Displays a multi-field form inside WhatsApp.
- Allows users to fill in details and submit them in one flow.
- Supports structured inputs like text fields, selections, and other form components.
- Helps collect information in an organized and user-friendly way.
- Best used for registrations, bookings, feedback forms, and detailed data collection without long chat conversations.
How to Create a WhatsApp Flows Form:
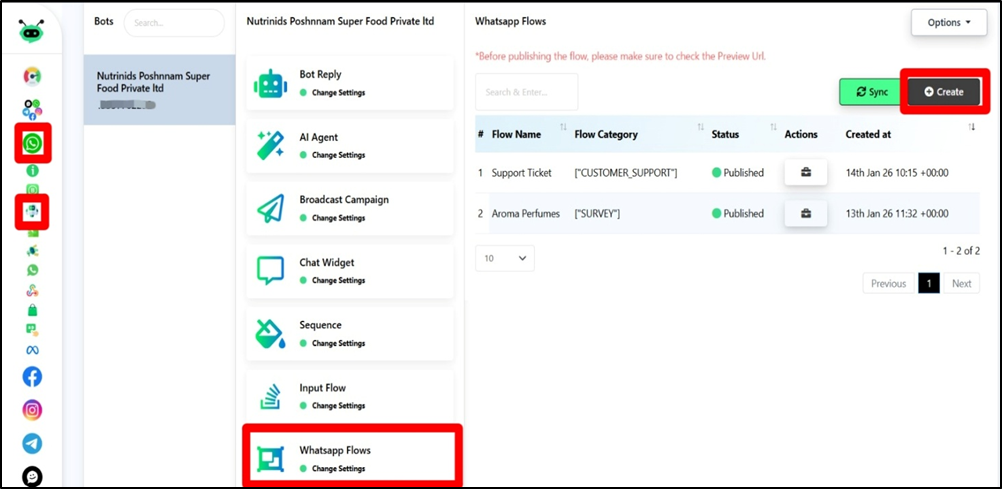
Step 1: Access WhatsApp Flows:
- Go to Bot Manager and select your bot account.
- Click on WhatsApp Flows.
- Click the Create button to start a new flow.
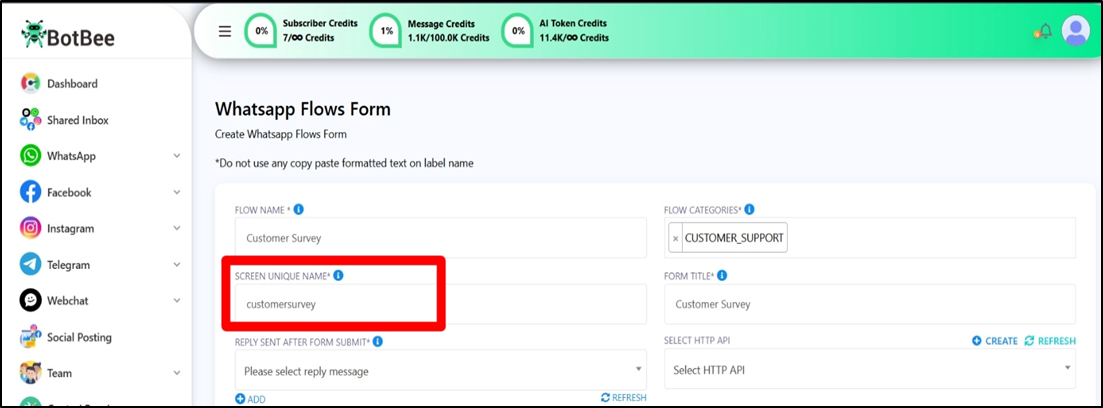
Step 2: Configure Flow Details:
- Fill in the basic details of your form.
- Name: Give your flow a unique and identifiable name.
- Category: Select a relevant category (for example, Appointment Booking)
- Screen Name: Enter a unique screen name using only lowercase letters, No spaces, No special characters.
- Form Title: Enter the title that users will see on the form.
Step 3: Set the Bot Reply:
- Choose the message users will receive after submitting the form.
- Select an existing Bot Reply from the dropdown.
- If a reply does not exist, Click the Add button.
- This opens the Visual Flow Builder.
- Create a simple Text Element reply (for example, “Thank you! We’ve received your details.”)
- Save it, refresh the Flow page, and select the newly created reply.
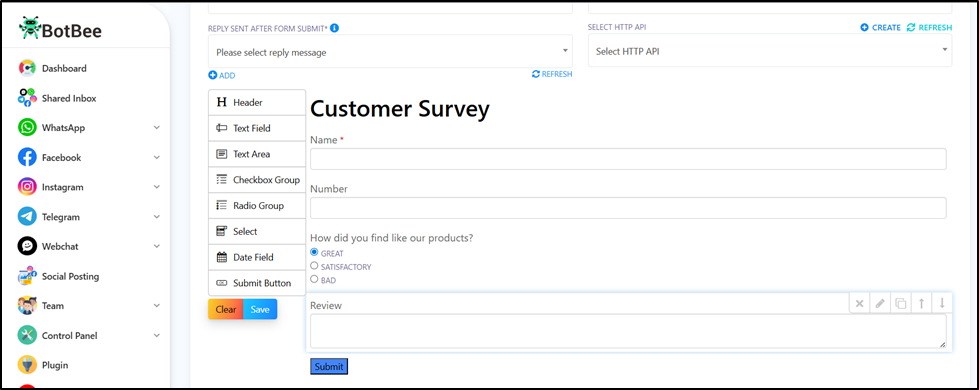
Step 4: Design the Form:
- Use the drag-and-drop builder to create your form layout.
- Add elements from the sidebar to the canvas:
- Header: Add a label to describe the section
- Text Fields: Use for details like Name, Phone Number, Email ID, Budget.
- Text Area: Use for longer inputs such as Address.
- Radio Buttons: Use for multiple-choice options like Rate our Product.
- Submit Button: Add a button to allow users to submit the form.
- Once all fields are added, click Save.
Step 5: Preview and Publish the Flow:
- Preview: Use the preview option to see how the form looks on a mobile screen by going on “Actions” and clicking on “Eye” icon.
- Publish: Click Publish to make the flow live.
(Note: Once a WhatsApp Flow is published, it cannot be edited or deleted.)
That’s it your WhatsApp Flow is ready now! Let’s continue with other elements now.
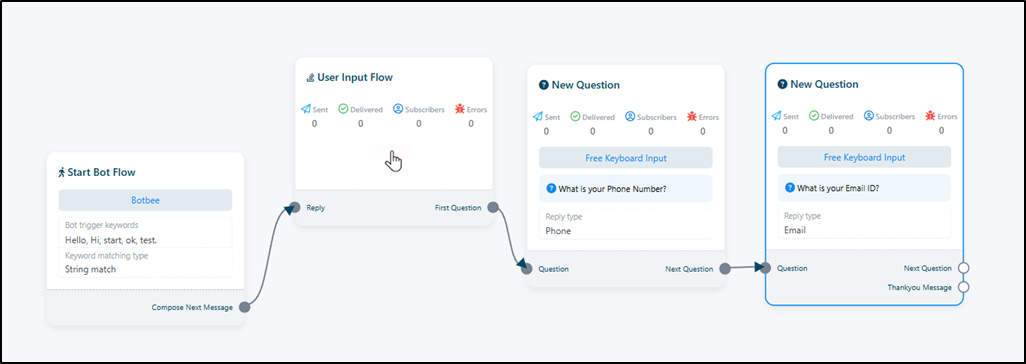
User Input Flow:
- The User Input Flow element is used to collect information directly from the user.
- Collects personalized details such as name, phone number, email ID, or other inputs.
- Asks questions one at a time and stores user responses.
- Supports different input types like text, phone number, email, and multiple choice.
- You can import these personalized details directly to your Google Sheets or any other Third Party Applications.
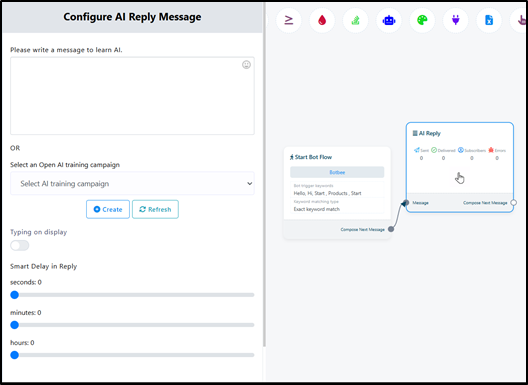
AI Reply Element:
- The AI Reply element enables automatic, intelligent responses using AI.
- Responds to free-text user messages.
- Understands user intent instead of fixed keywords.
- Provides dynamic, conversational replies.
- Reduces the need for predefined flows for every question.
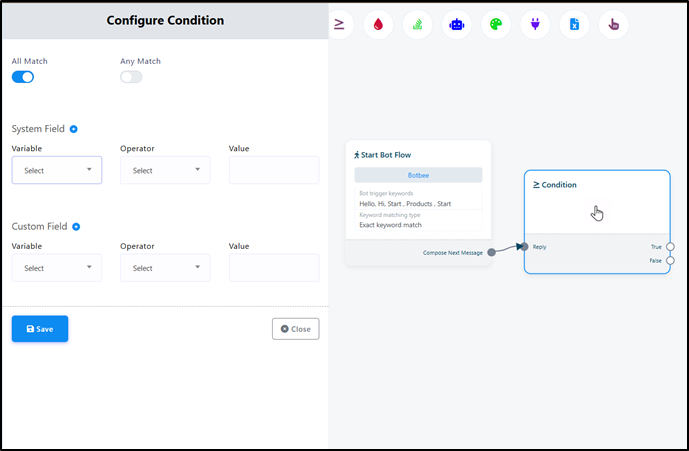
Condition Element:
- The Condition element is used to create logic-based chatbot flows.
- Routes users based on specific conditions (e.g., user input, variables, tags, or responses)
- Creates personalized and dynamic user journeys.
- Helps design smarter automation flows.
- Best for building intelligent flows that change based on user behavior.
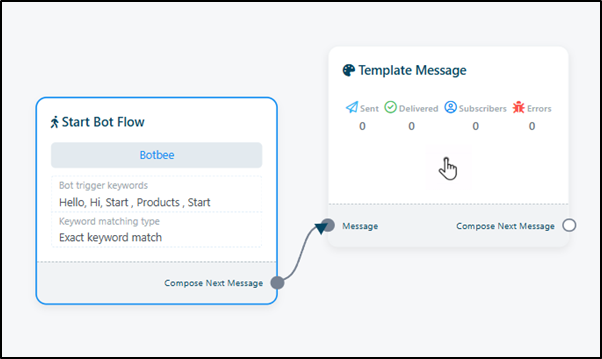
Template Message:
- Uses pre-approved WhatsApp templates.
- Allows businesses to re-engage users after 24 hours.
- Supports notifications, alerts, reminders, and updates.
- Required for outbound communication beyond the session window.
- Essential for follow-ups, confirmations, and business notifications on WhatsApp.
Sequence Messages:
- Sequence Messages allow you to send messages to users automatically at scheduled time intervals instead of all at once.
- Messages can be sent after a specific delay (for example, after 1 hour, 1 day, or 30 days max.)
- Useful for sending follow-ups, reminders, onboarding messages, or notifications.
- It can work within the 24-hour WhatsApp session window as well as outside the 24-hour window using approved template messages.
- Sending messages inside the 24Hr window is free but Sending messages after 24Hr window is paid.
- There are two methods on how we Create a Sequence.
Methods 1: From Chatbot Flow Builder:
Within 24 hours window:
- Click on the message after which you want the sequence and click on “Subscribe to Sequence” and add New Sequence.
- Enable the Inside 24Hr Toggle and write your message along with the scheduled time.
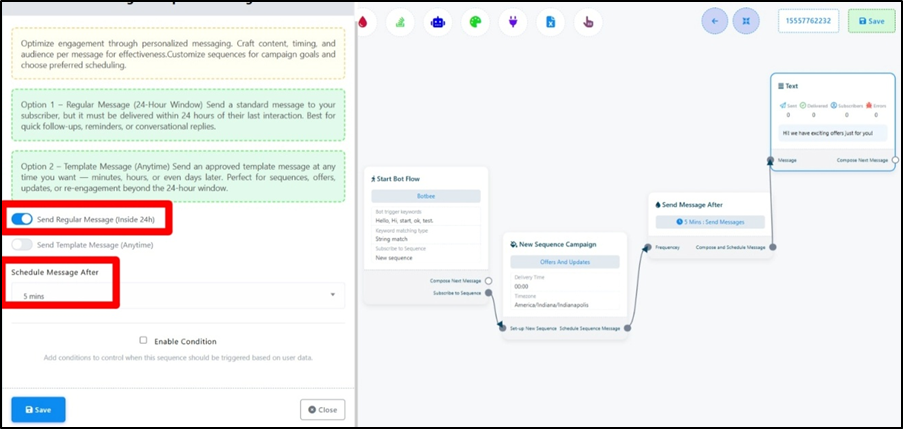
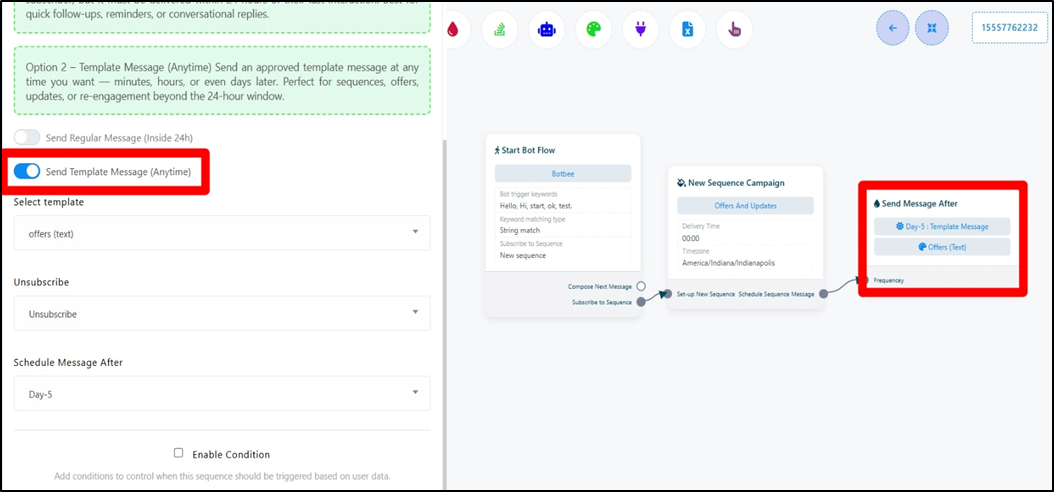
Anytime (Outside 24Hr Window):
- Click on the message after which you want the sequence and click on “Subscribe to Sequence” and add New Sequence.
- Enable the Anytime Toggle and write your message along with the scheduled time.
- A Message Template is needed for Anytime messages.
For Further information on how to create a message template refer this video: https://youtu.be/4Vy3SeGFKhI?si=NFhiIBunLZRoZJR2
Method 2: From Bot Manager:
- Go to Bot Manager and click on Sequence then Create.
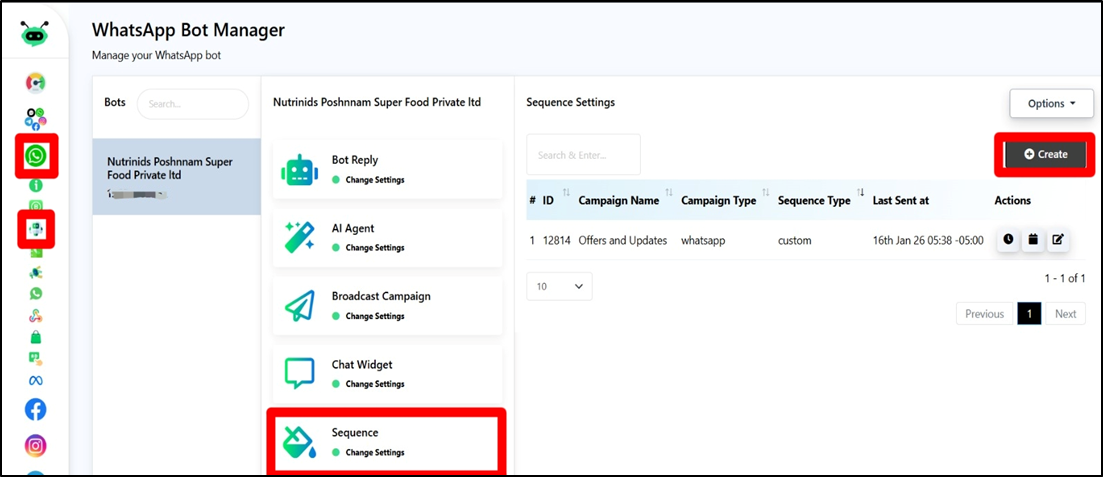
- A new flow builder will open after that, make the sequence as mentioned above in the Method 1.
- To add this sequence in your Chatbot Import the Import the saved sequence.
You’ve now explored all the key elements needed to build a fully functional WhatsApp chatbot from messaging and interactions to data collection and automation giving you a strong foundation to create effective and engaging chatbot experiences.
Reference Video:
If you prefer video tutorials here are the links:
English: https://youtu.be/TU9WJnaV9Bg?si=SXLWTNducSKi2WiO
https://youtu.be/9Nh3NBCk6EI?si=encySGcIAwNGiGrE
Hindi: https://youtu.be/bDMmpseuNUY?si=P0m6R7VsZwkUXp99
Tamil: https://youtu.be/_DAj3uzc1Lk?si=dNmGNNlBrHTWx7FQ
Still Need Help?
If you face difficulties during onboarding:
- Take a screenshot or screen recording.
- Share details with our support team.
Our team will review the onboarding step and guide you further.
Contact: 08069645300
Found this article helpful?
( 1 Out of 2 Found Helpful )