How to Create a Broadcast Campaign
A Broadcast allows you to send bulk messages to your audience even if they haven’t interacted with your bot recently. This method is ideal for marketing updates, announcements, or important notifications. Since WhatsApp requires prior approval for such messages, you must first create a Message Template before launching a broadcast. Follow the step-by-step guide below to set up and send your campaign smoothly.
Phase A: Create a Message Template (Prerequisite):
( Note : Before creating a message template, make sure you must have your payment method added along.)
Before sending a broadcast, you need to create and get approval for a message template.
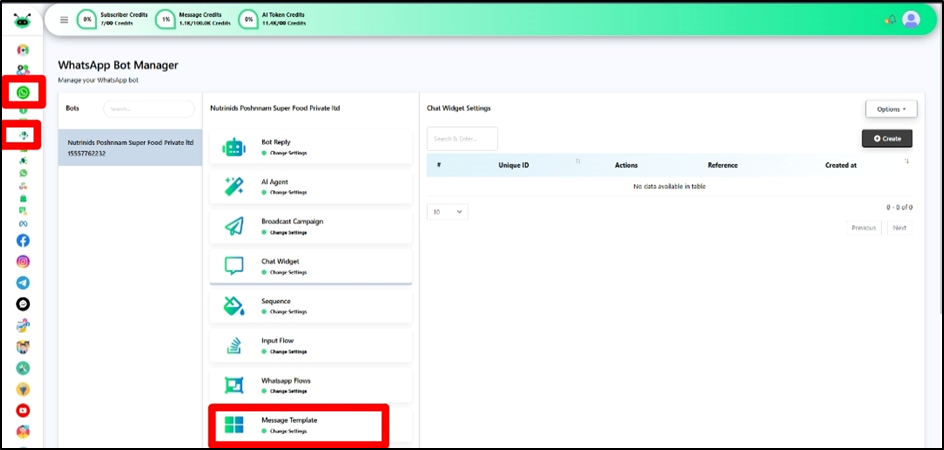
Step 1: Open Bot Manager:
- Go to Bot Manager from the WhatsApp menu.
- Select your Bot Account.
- Click on Message Template.
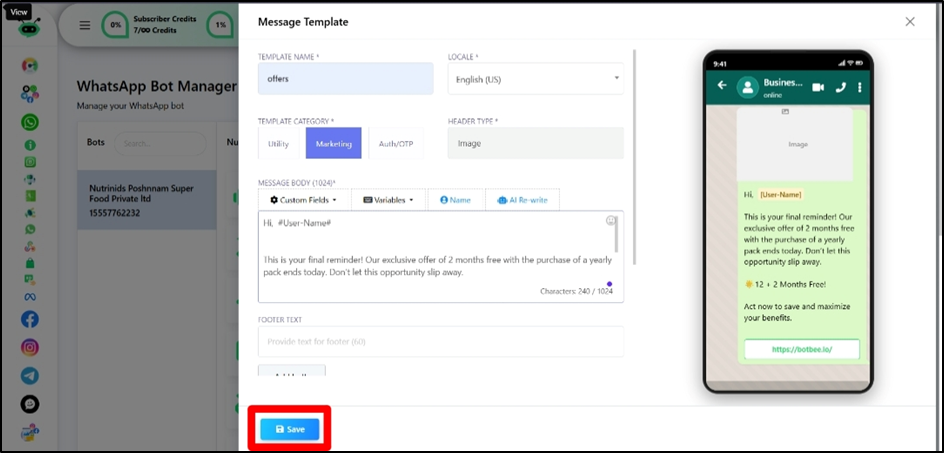
Step 2: Create a New Template:
- Click Create and then Mixed Templates.
- Configure the following fields:
a) Template Name & Language:
- Give a name for the template and Select the appropriate locale (language).
(Note: The template name must be in lower characters only and give underscores instead of using space)
b) Template Category:
- Utility: Used for normal, short informational messages.
- Marketing: Used for promotional or engagement messages. It can include text, images, videos, and documents.
- Authentication: Used specifically for one-time passwords and verification messages.
Different WhatsApp message categories are charged at different rates by Meta. You can view the latest WhatsApp Conversation Charges by Meta here: Meta Conversation Charges
(There is no additional markup charged by Botbee on WhatsApp messaging. Pricing is governed solely by Meta’s official rates.)
c) Header Type:
- Select desired Text, Image, Video or Document .
d) Body content:
- Write the main message content.
- You can use variables like Name, order id to insert personalized data such as the user's name, order ID, or other dynamic information.
- These variables will be filled in while creating the broadcast campaign.
e) Footer & Buttons (Optional):
- Add footer text if needed.
- Include Call-to-Action or Quick Reply buttons if required.
Step 3: Save and Submit for Approval
- Click Save.
- The template will be submitted for WhatsApp approval.
- Approval usually takes 5-10 minutes if the template follows WhatsApp guidelines.
(Note: Creating a template for the first time can take up to 24 hrs for approval.)
(Note: You can see the template preview in real time)
Phase B: Import Subscribers (Required for Broadcasting):
Before sending a broadcast campaign, make sure your subscriber list is available in BotBee. You can import subscribers easily using a CSV file.
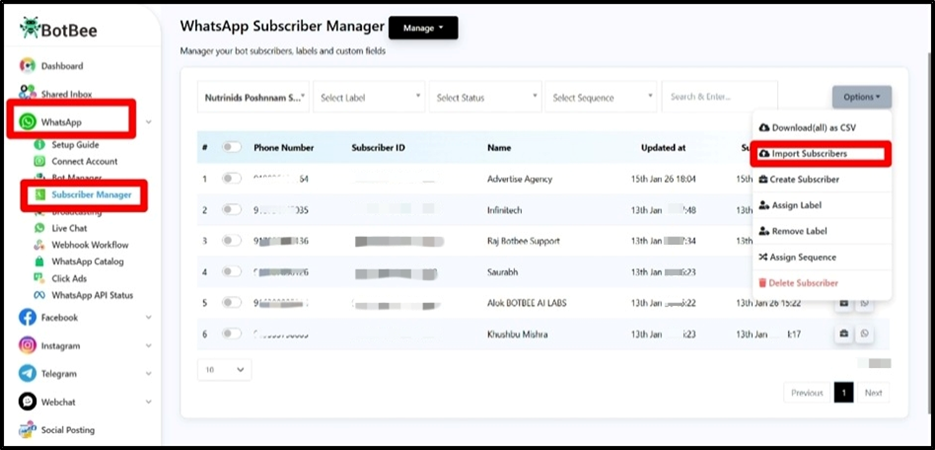
Step 4: Choose the Import Option:
- In the BotBee dashboard, go to Subscriber Manager.
- Choose the specific Bot Account for which you want to import subscribers.
- Click on Import Subscribers from the menu.
Step 5: Choosing label:
- Select an existing label or create a new one for the subscriber list.
- If no label is selected, BotBee will automatically use the CSV file name as the label.
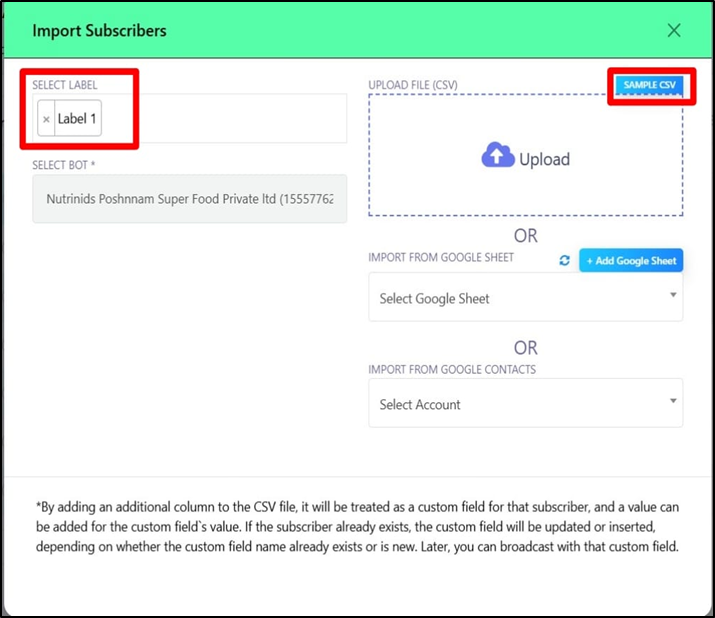
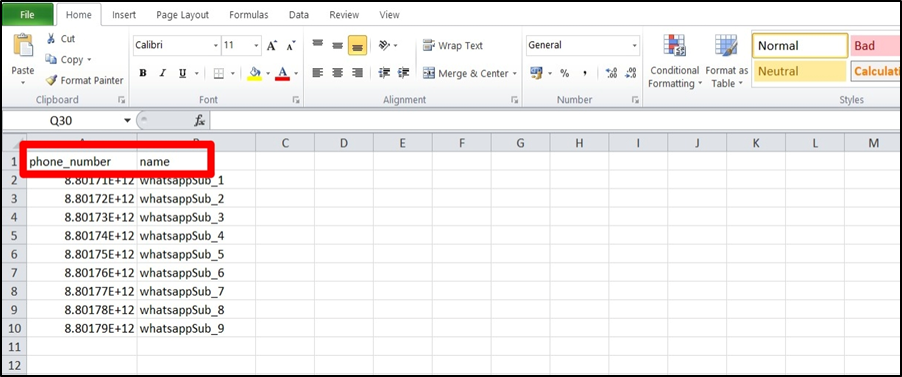
Step 6: Prepare Your CSV File:
- Download the sample CSV file to understand the correct format.
- Ensure your CSV contains the required columns with the same column names as shown in the sample file.
(Note: Your Phone numbers must include the country code but Not include the "+" sign. Example: For India: 91xxxxxxxxxx)
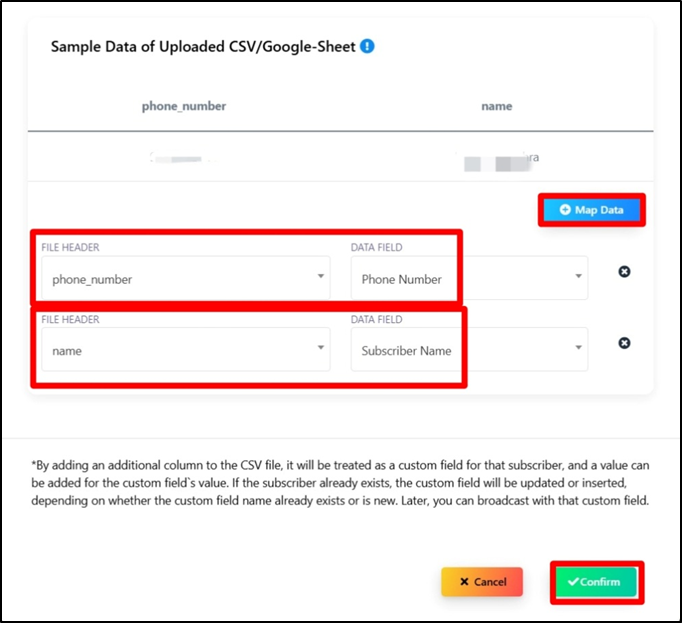
- Click on “Map Data” and make sure your fields are aligned correctly. Click on Confirm then.
- Once completed, you will see the message "Subscribers imported successfully.
Phase C: Run the Broadcast Campaign :
Step 7: Start a New Broadcast Campaign:
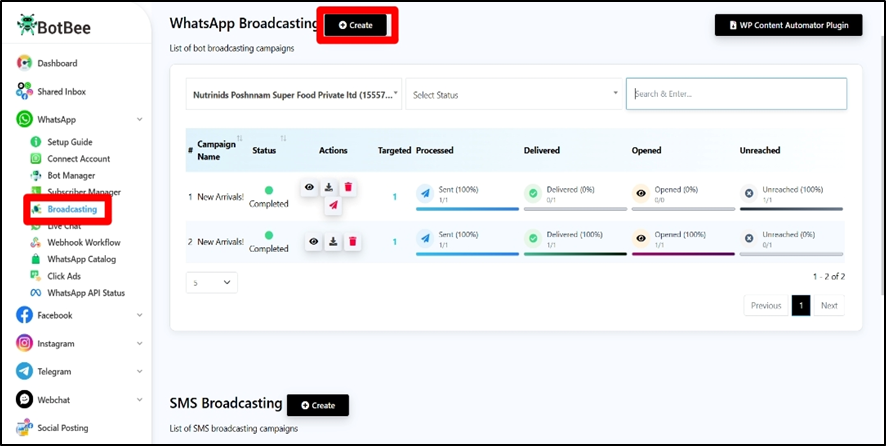
- Go to WhatsApp and then Broadcast and Click Create.
- Enter a Campaign Name.
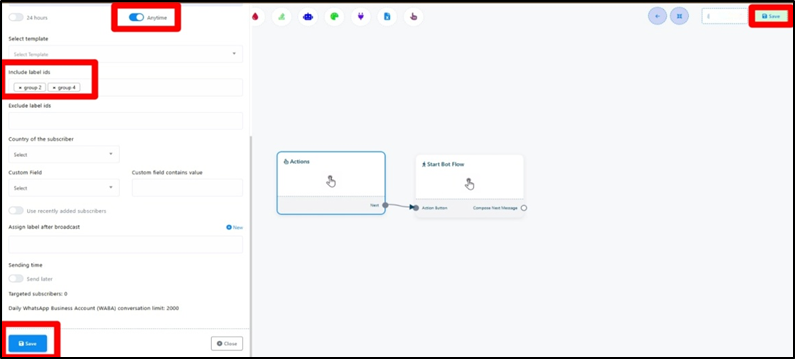
- Select Anytime as the campaign type.
- Select the Message Template you created.
- Include the Labels which contains the Subscriber names.
- Sending Time: You can Schedule this campaign for some other time by selecting correct and choosing the time. Or you can just send it right away.
- Click Save and Close the Window.
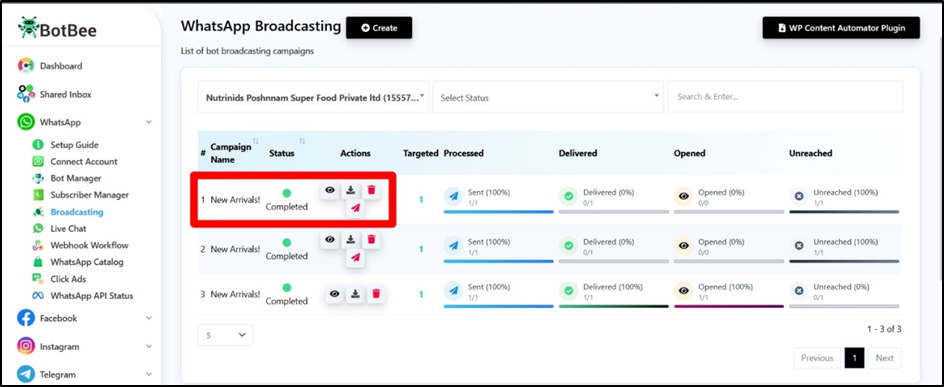
- The Broadcast Campaign is successful, we can see it in the Broadcasting List. You can see the status of the Campaign by selecting the Eye Icon.
That’s it! By completing these steps, you’re ready to reach your subscribers with personalized WhatsApp broadcasts using BotBee.
Reference Video:
If you prefer video tutorials here are the links:
English: https://youtu.be/4Vy3SeGFKhI?si=WHeNq8n4sW4rmZGX
Hindi: https://youtu.be/yfiNUEaWvJ8?si=V1t-SxKLNaxfyVM9
Tamil: https://youtu.be/Yvb8UxO4tRI?si=lB5F7zmxpzqHHFkO
Still Need Help?
If you face difficulties during onboarding:
• Take a screenshot or screen recording.
• Share details with our support team.
Our team will review the onboarding step and guide you further.
Contact: 08069645300
Found this article helpful?
( 1 Out of 2 Found Helpful )