How to create OTP Message Template
In today’s digital landscape, secure and seamless user verification is essential for building trust and protecting user data. One of the most widely used methods to achieve this is through One-Time Passwords (OTPs), which provide a quick and reliable way to authenticate users during login, registration, or transaction processes.
With BotBee, creating and managing OTP templates becomes simple and efficient, allowing businesses to automate verification workflows while maintaining a smooth user experience. In this guide, we’ll walk through the step-by-step process of setting up OTP templates in BotBee, helping you implement secure authentication with ease.
Step 1: Navigate to Template Library:
- Navigate to the BotBee Dashboard
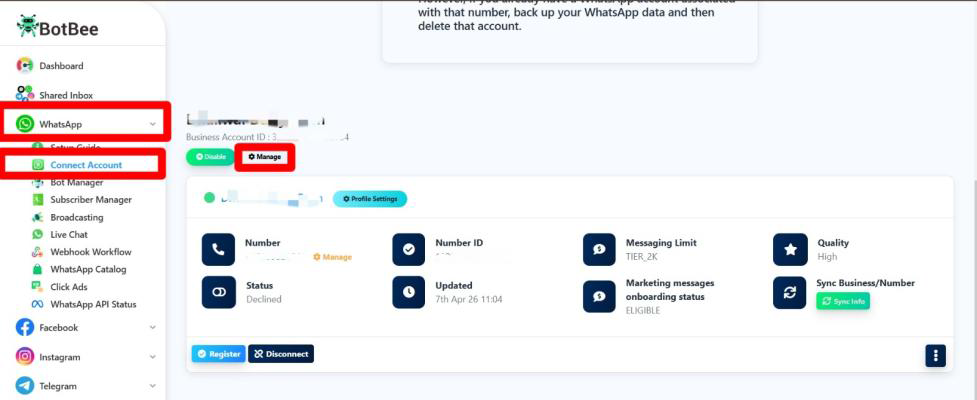
- Click on “Connect Account” under the WhatsApp section
- Scroll down to your profile details and Click on “Manage” to open your account settings.
- You will be redirected to Business Overview in Meta.
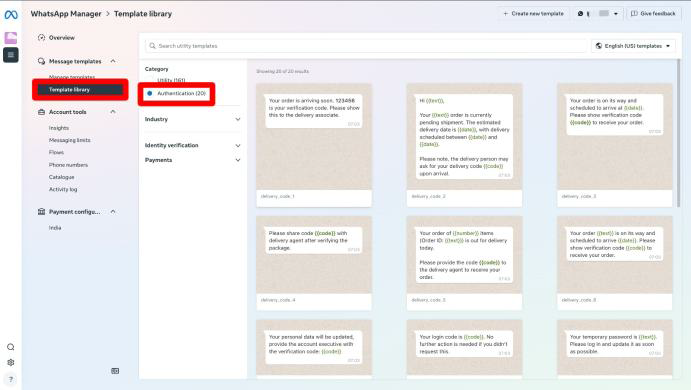
- From the left side menu, Click on Template Library.
- Choose “Authentication” as Category.
- You will see some Pre-made templates for OTP Verification.
- Select any template as per your need.
Step 2: Create and Configure Your OTP Template:
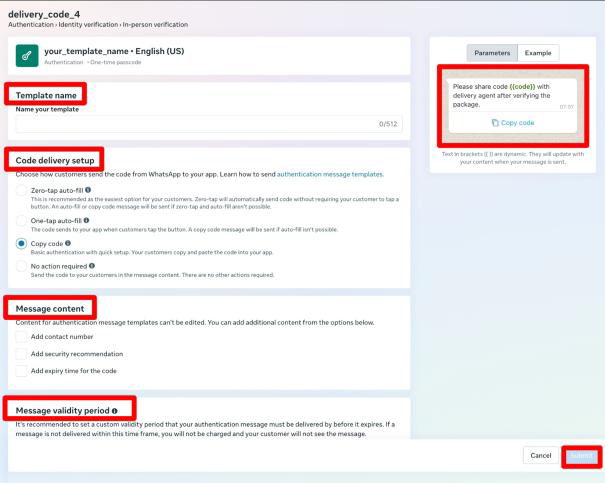
Enter Template Name: Give your template a clear and relevant name for easy identification.
Choose Code Delivery Setup: Select how users will receive and use the OTP.
- Zero-tap Auto-fill: Automatically detects and fills the OTP without user action.
- One-tap Auto-fill: Lets users fill the OTP with a single tap.
- Copy Code: Users copy the OTP by clicking on the button.
- No Action: Users manually copy and paste the OTP.
Customize Message Content: You can enhance your OTP message by adding:
- Add Contact Number: Include a support number for user assistance.
- Add Security Recommendation: Show a brief note to keep the OTP confidential.
- Add Expiry Time: Inform users about how long the OTP is valid.
- Set Message Validity Period: Define how long the OTP message remains valid before it expires.
On the right side, you’ll also see a live preview of how your OTP message will appear to users, helping you ensure clarity and accuracy before submission.
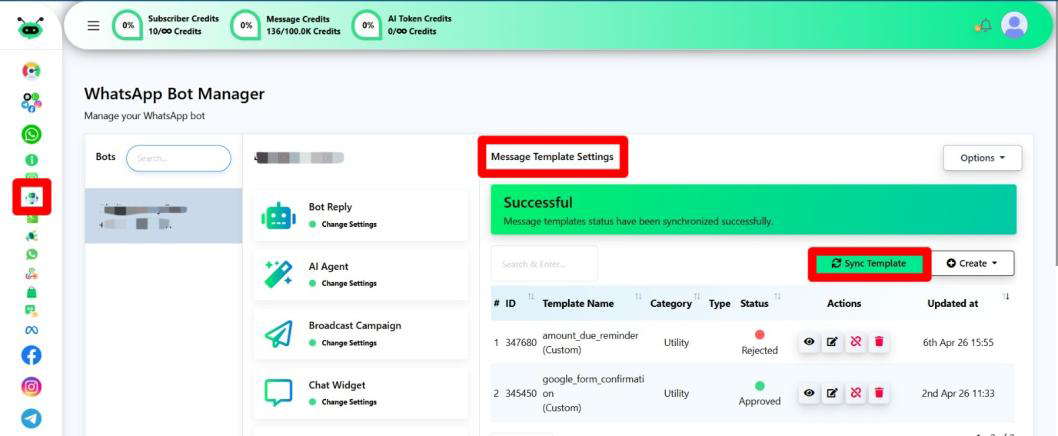
- After submitting the template Go back to BotBee.
- Go to Bot Manager → Message Templates
- Click on Sync Templates and wait for it to get approved.
Step 3: Get End Point URL:
- After the template is Approved, you will have to Integrate it with your website.
- Click on BotBee profile icon → API Developer
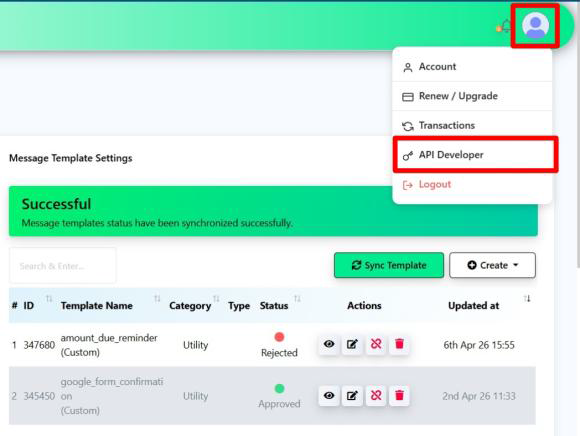
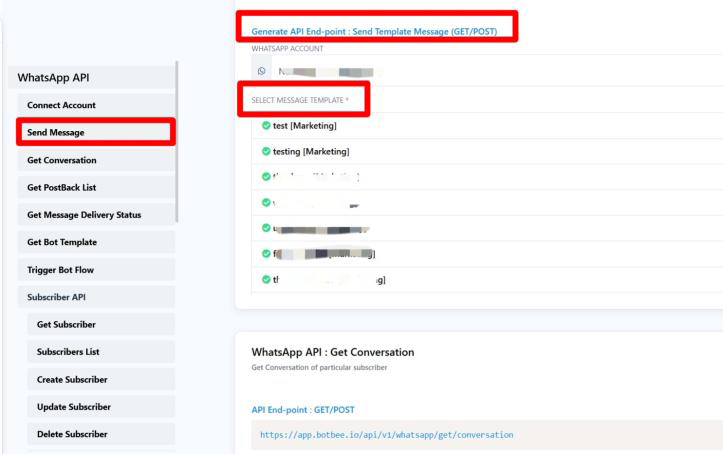
- Click on Send Message from the left side menu.
- Scroll down and Go to “Generate API End-point : Send Template Message (GET/POST)”
- Select the template you created.
- Generate the End Point URL for integration.
This endpoint can now be used in your website or application to trigger OTP messages seamlessly.
Setting up OTP templates in BotBee is a straightforward process that helps you add a secure and reliable layer of user authentication to your platform. From creating and customizing the template to integrating it with your website via API, each step is designed to be simple and efficient.
By leveraging BotBee’s OTP capabilities, businesses can ensure faster verification, improved user experience, and enhanced security. Once integrated, your system will be ready to send automated OTP messages seamlessly, making user authentication both smooth and trustworthy.
Still Need Help?
If you face difficulties during onboarding:
Take a screenshot or screen recording.
Share details with our support team.
Our team will review the onboarding step and guide you further.
Contact: 08069645300
Found this article helpful?
( 0 Out of 0 Found Helpful )