How to Create a Message Template with Variables
Message templates with variables allow you to send personalized and dynamic messages at scale. Instead of creating a new message every time, you can reuse one template and automatically insert values like names, links, or booking details.
Below is a step-by-step guide on how to create a message template with variables.
Step 1: Open Message Template:
- Go to Bot Manager from the WhatsApp Menu.
- Select your Bot Account.
- Click on “Message Template.”
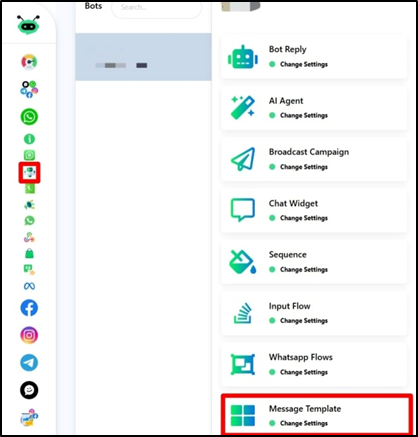
- Scroll down to the bottom of the page.
- Find the Template Variables section.
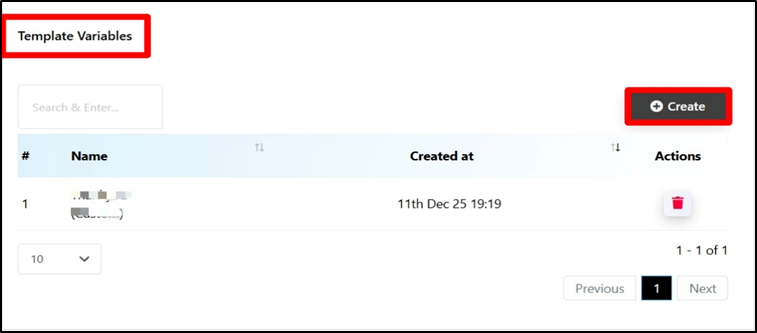
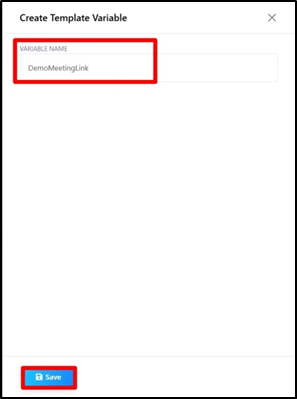
Step 2: Create a New Variable:
- Click on the Create button
- Enter a variable name (No spaces allowed)
- Click Save
- Refresh the page to load the variable.
Step 3: Create a Message Template:
- Click Create and then Mixed Templates.
- Configure the following fields:
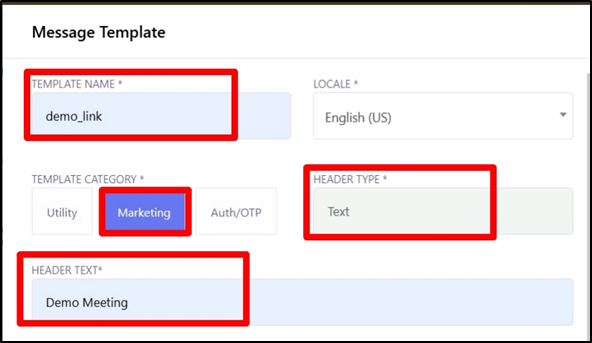
a) Template Name & Language:
- Give a name for the template and Select the appropriate locale (language).
(Note: The template name must be in lower characters only and give underscores instead of using space)
b) Template Category:
- Utility: Used for normal, short informational messages.
- Marketing: Used for promotional or engagement messages. It can include text, images, videos, and documents.
- Authentication: Used specifically for one-time passwords and verification messages.
Different WhatsApp message categories are charged at different rates by Meta. You can view the latest WhatsApp Conversation Charges by Meta here: Meta Conversation Charges
(There is no additional markup charged by Botbee on WhatsApp messaging. Pricing is governed solely by Meta’s official rates.)
c) Header Type:
Select desired Text, Image, Video or Document.
Step 4: Compose the Message with Variables:
- Write the main message content.
- To insert a variable, Click on Variables.
- Select the variable you created from the list.
(Note: Do not end the message with a variable, always add text after the variable)
d) Footer & Buttons (Optional):
- Add footer text if needed.
- Include Call-to-Action or Quick Reply buttons if required.
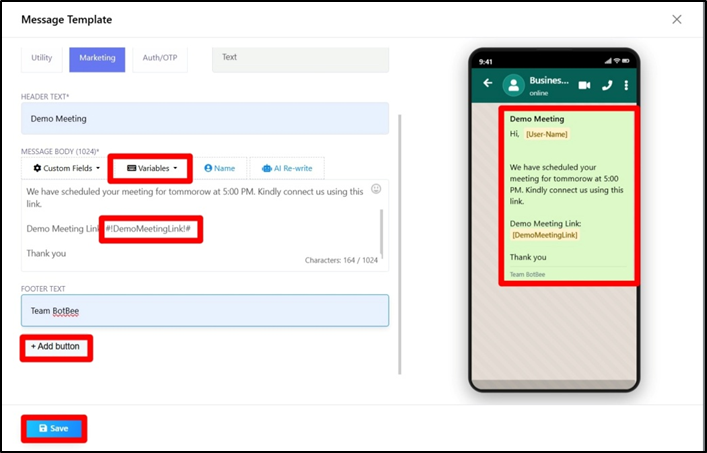
Step 5: Save and Submit for Approval:
- Click Save.
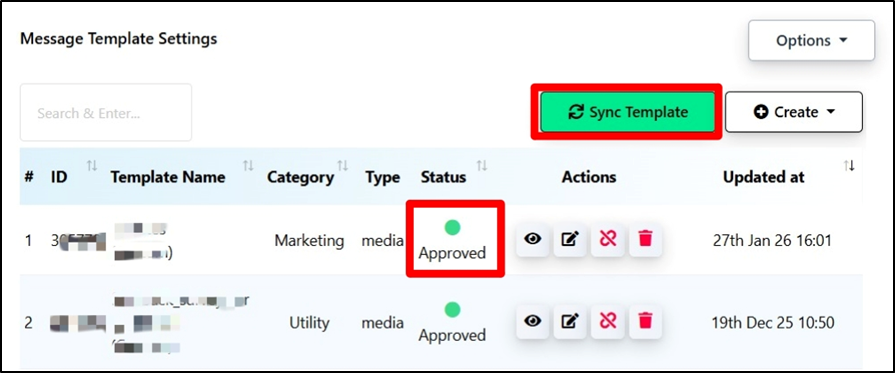
- The template will be submitted for WhatsApp approval.
- Click on “Sync Templates.”
- Approval usually takes 5-10 minutes if the template follows WhatsApp guidelines.
(Note: Creating a template for the first time can take up to 24 hrs for approval.)
Once your message template is saved and approved, you can send it to your customers by adding personalized data at the time of sending.
Now let’s test how this message template works while broadcasting and while sending it directly through live chat.
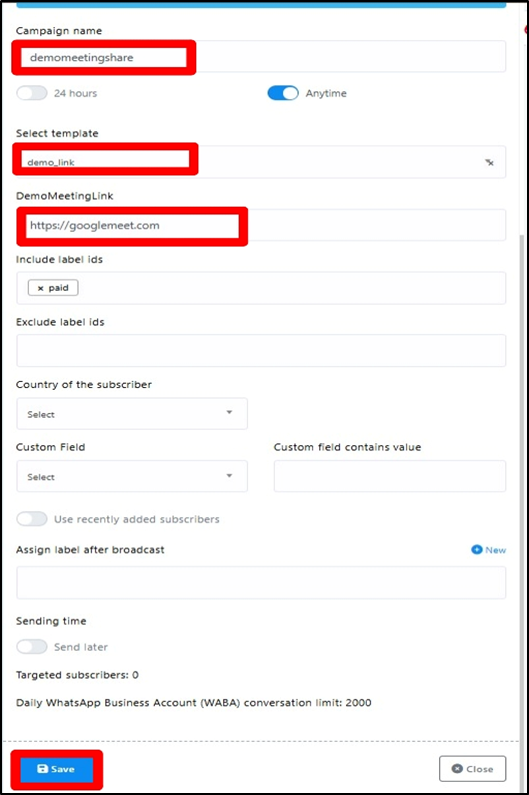
In Broadcasting:
- Go to WhatsApp and then Broadcast and Click Create.
- Enter a Campaign Name.
- Select Anytime as the campaign type.
- Select the Message Template you created.
- Now write the message you want to add in the variable area.
- Include the Labels which contain the Subscriber names.
- Sending Time: You can Schedule this campaign for some other time by selecting correct and choosing the time. Or you can just send it right away.
- Click Save and Close the Window.
The Broadcast Campaign is successful, we can see it in the Broadcasting List. You can see the status of the Campaign by selecting the Eye Icon.
In Live Chat:
- Go to shared Inbox.
- Open the chat of the customer you want to send the template to.
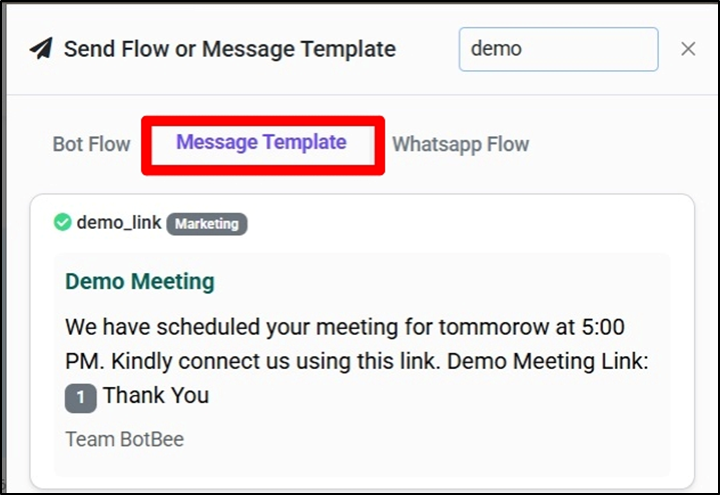
- Click on the plus icon and select “Send Flow or Message Template”.
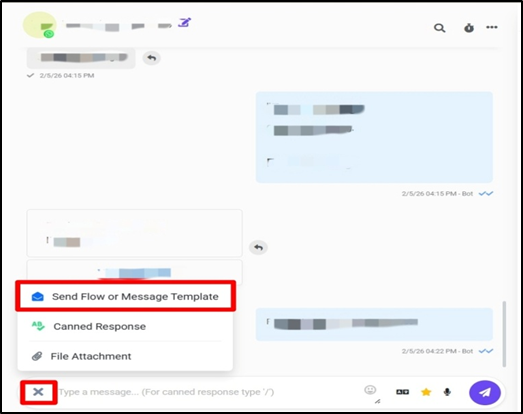
- Select the message template you just created.
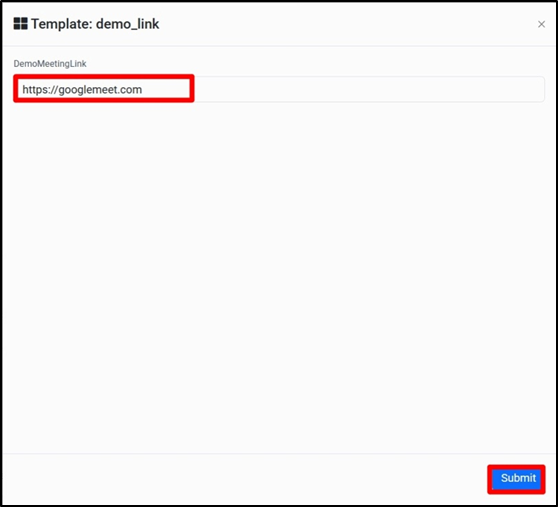
- Now write the message you wanted in the variable.
- Click on Submit.
- Your message will be sent along with the variable message.
You can also connect your Google Sheets, website, or CRM tools to automatically fetch customer data and populate variables in real time. This ensures accurate, consistent, and scalable messaging without manual work, making your customer communication faster and more efficient.
Using variables in message templates helps you personalize communication without manual effort. By creating variables once and reusing them across templates, you save time, reduce errors, and maintain consistency especially when sending transactional or automated messages.
Still Need Help?
If you face difficulties during onboarding:
- Take a screenshot or screen recording.
- Share details with our support team.
Our team will review the onboarding step and guide you further.
Contact: 08069645300
Found this article helpful?
( 1 Out of 2 Found Helpful )