How to Use Custom field variable in Broadcasting
Sending bulk messages is easy. Sending messages that feel personal and actually get responses that’s where most people fail.
With BotBee, you can combine subscriber data with dynamic templates to deliver highly personalized WhatsApp broadcasts at scale. Here’s a clean, refined guide to doing it the right way.
Step 1: Import Your Subscriber List:
- Before importing subscribers you’ll need to create custom fields.
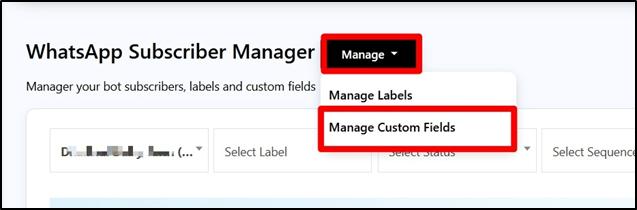
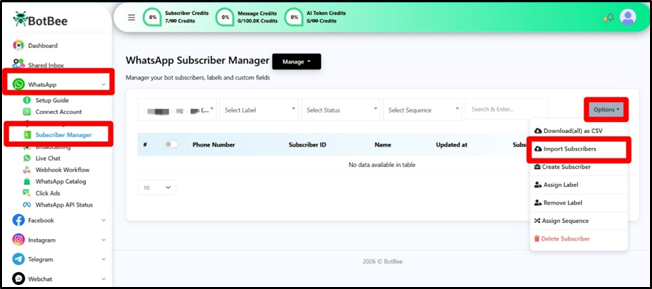
- For that Go to Subscriber Manager under WhatsApp.
- Click on Manage → Manage Custom Fields.
- Go back to the Subscriber Manager
- Navigate to Options → Import Subscribers.
- Click on “Sample CSV” to download the sample CSV file.
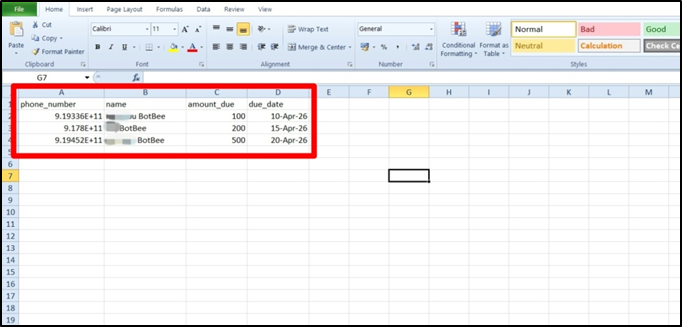
- Include essential fields like Name and Phone Number in your file.
(Note: Make sure the numbers have their country code without + sign)
- Add extra columns for personalization such as: due_amount, deadline, appointment_time.
- These additional columns become Custom Fields—unique data points attached to each subscriber.
- Save the file and Upload it.
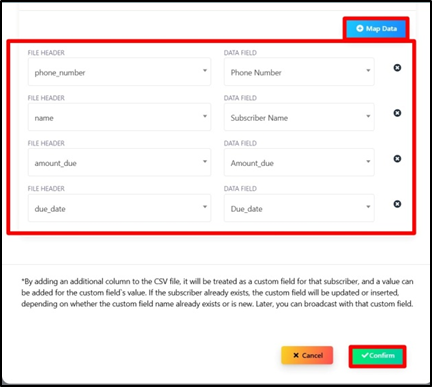
Click on Map Data and Map the data correctly:
- Phone_number → Phone Number
- Name → Subscriber Name
- Amount_due → Amount_due
- due_date → Due_date
- Once uploaded, every contact will carry their own personalized information, ready to be used in messaging.
- If you look at a subscriber you'll notice that the custom variable data has been added to them.
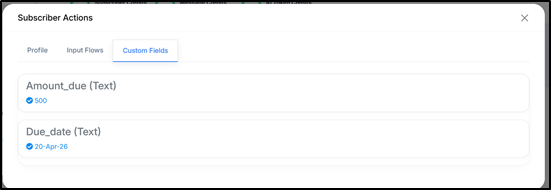
Step 2: Create a Message Template:
- Go to Bot Manager → Message Template.
- Click on Create and Mixed templates.
- Write your message naturally, and insert custom fields where personalization is needed.
Here’s what’s happening:
- Custom Fields store the data (Name, Due Amount, Deadline)
- Variables pull that data into the message
- Once your template is ready, save it and wait for approval.

Step 3: Set Up the Broadcast Campaign:
- With your data and template ready, you can now launch the campaign.
- Go to the Broadcast section and click Create.

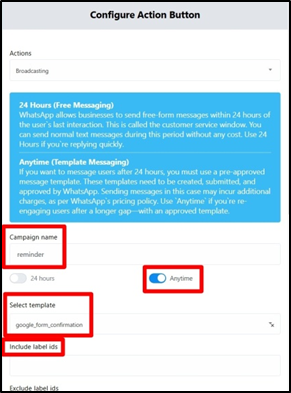
In the Visual Flow Builder:
- Assign a clear campaign name.
- Choose your schedule (e.g., Anytime or a specific time)
- Select the approved message template
- Next, in the Include Label ID field, select the label assigned during subscriber import. This ensures your message targets the correct audience.
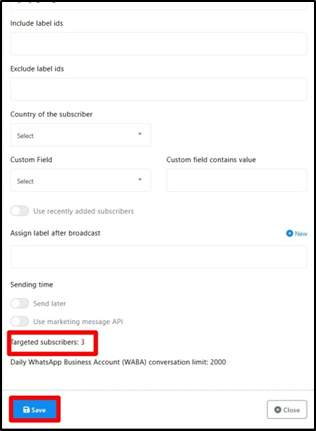
Before launching:
- Verify the Targeted Subscribers count
- Double-check your template selection
- Click Save to launch the campaign
What Your Subscribers Receive
- Once the campaign is live, each user gets a personalized message based on their own data.
- Example: Hi, XYZ your payment for amount ₹2,500 is due on 10 April.
- That small shift from generic to personal significantly improves engagement and response rates.
Reference Video:
If you prefer video tutorials here are the links:
English: https://youtu.be/q_TJF8BOm6I?si=0bS4pIDKjb00mBoK
Still Need Help?
If you face difficulties during onboarding:
- Take a screenshot or screen recording.
- Share details with our support team.
Our team will review the onboarding step and guide you further.
Contact: 08069645300
Found this article helpful?
( 0 Out of 0 Found Helpful )